In order to start using your Raspberry Pi you will need a few other bits of equipment. The Pi is supplied on its own so you will either need to have these items available or buy them. Luckily none of the items are particularly expensive and you will possibly have a few of them already.
- Display and cable
- 5V MicroUSB Power Source
- USB Keyboard
- USB Mouse
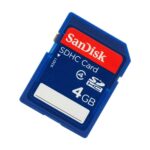
- SD card (4GB or larger)
If you have a Model A or A+ you will require :
- USB hub, to allow the mouse and keyboard to be connected to the single USB port.
If you have a Model B or Model B+ you may also require :
- Standard network cable
Display
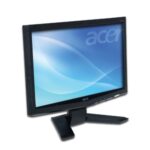 The display is probably the most expensive item you require so it’s best if you can use an existing device. You need a computer monitor or TV with HDMI, DVI or Composite Video inputs. The Raspberry Pi can output video via its HDMI or Composite Video connectors. The HDMI signal can easily be converted to DVI using a cheap converter cable.
Note : There is no VGA signal available and you can not convert to VGA with just a cable. VGA is analogue and HDMI is digital. A cable can not convert between the two despite the claims of some internet sellers. You can purchase various HDMI to VGA adapters but you should only buy one that a current Pi owner has confirmed as working.
5V Power Supply
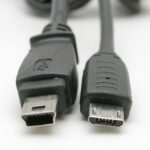 The Pi needs to be powered via a power supply with a MicroUSB connector. This is the connector shown on the right in the photo and not to be confused with the MiniUSB connector (shown on the left). This is the connector on new mobile phone chargers and these are easy to find and cheap to buy. The only thing you need to ensure is the unit provides 5V with a current of 1A (1000mA). Some chargers will only provide 500mA which may be enough for a Model A but will not be enough for a Model B. Going for a 1A supply will save you having to worry about it later.
USB Keyboard & Mouse
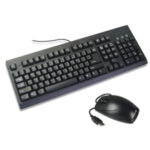 Most standard USB keyboards and mice will work with the Pi when connected to a USB port. In order to connect both to a Model A Pi you will need to connect a USB hub which will give you at least two additional ports. Some Keyboards include a built in hub and this would mean you could avoid buying a separate device.
USB Hub
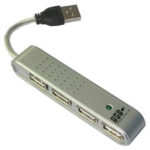 If you require more USB ports than your Pi can provide you can connect a USB hub. A hub provides additional USB ports. A USB port can only provide a certain amount of power so you may need a hub that has its own power. The four ports shown in the photo will be sharing the power available from the port it is plugged into as this example hub has no external power. A keyboard and mouse should operate correctly using an un-powered hub.
The Pi has no on board storage and when it powers-up it expects to find an SD card with an operating system on it. You can either purchase a preloaded card from the RaspberryPi Foundation or make your own. This is free and easy to do and all you need is a suitable SD card.
| Pi Model | Card Type |
| Model A, Model B | SD, SDHC |
| Model A+, Model B+ | MicroSD, MicroSDHC |
| Pi 2 Model B | MicroSD, MicroSDHC |
The original Model A and Model B support standard SD cards. The Model A+,B+ and Pi 2 make use of MicroSD cards.
SD cards have a speed rating (or “Class”) and a class 4 or 6 card will work fine. In terms of size a 4GB card is a good starting point. Larger cards may be required but it depends on what you plan to do with the device. For instructions on creating your own bootable SD card please see the Create an SD Card with ‘Fedora Remix’ page.

