Facebook Twitter Instagram Pinterest YouTube
    Trending
    • Add Kodi to RetroPie Menu
    • Disable Auto-login in Raspberry Pi OS
    • Raspberry Pi Cloud Storage with MEGA
    • RetroPie Temperature Monitor from Menu
    • Pi Pico Pinout and Power Pins
    • Install Arduino IDE on Raspberry Pi
    • Raspberry Pi 400 SSD Upgrade
    • Raspberry Pi Temperature Monitoring
    Facebook Twitter Instagram Pinterest YouTube RSS
    Raspberry Pi SpyRaspberry Pi Spy
    • Home
    • Categories
      • General
      • Hardware
      • Programming
      • Python
      • Software
      • Tutorials & Help
    • BerryClip
      • BerryClip Instructions
      • BerryClip Plus Instructions
      • Videos & Reviews
    • Buy
      • Buy Pi
      • Buy Pi Accessories
      • Buy Books
    • Tools
      • Ultimate Raspberry Pi Alexa Skill
      • Pi Power Estimator App
      • Pi-Lite 14×9 LED Matrix Sprite Editor
      • RPiREF Pin-out Reference App
      • Simple Ohm’s Law Calculator
      • Web Sites & Links
    • Tutorials & Help
        Featured
        November 9, 20200

        Raspberry Pi Temperature Monitoring

        Recent
        May 6, 2022

        Add Kodi to RetroPie Menu

        February 26, 2022

        Disable Auto-login in Raspberry Pi OS

        February 2, 2022

        Raspberry Pi Cloud Storage with MEGA

      1. Contact Us
      2. Site Map
      Raspberry Pi SpyRaspberry Pi Spy
      You are at:Home»Hardware»Cheap PIR Sensors and the Raspberry Pi – Part 2
      PIR Module #2
      PIR Module

      Cheap PIR Sensors and the Raspberry Pi – Part 2

      6
      By Matt on February 24, 2013 Hardware, Python, Tutorials & Help

      PIR Module #3Following on from my first PIR sensor module article I thought I would create a Python script that allowed me to easily measure the reset time.

      That way I could attach a module, run the script and measure the time it took for the output pin to drop back to the Low state. Then I could tweak the trimming resistor and adjust the reset time to my preferred value in a more controlled and precise way.

      Example Python Script

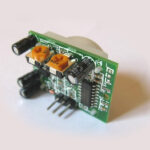
      The following script assumes you have your PIR module connected to the GPIO header as shown in Part 1. The example uses GPIO7 (Pin 26).

      Cut and paste the script below into a text file and transfer to the Pi or download the script directly using this link (recommended).

      #!/usr/bin/python
      #+-+-+-+-+-+-+-+-+-+-+-+-+-+-+-+-+-+-+-+-+-+
      #|R|a|s|p|b|e|r|r|y|P|i|-|S|p|y|.|c|o|.|u|k|
      #+-+-+-+-+-+-+-+-+-+-+-+-+-+-+-+-+-+-+-+-+-+
      #
      # pir_2.py
      # Measure the holding time of a PIR module
      #
      # Author : Matt Hawkins
      # Date   : 20/02/2013
      
      # Import required Python libraries
      import time
      import RPi.GPIO as GPIO
      
      # Use BCM GPIO references
      # instead of physical pin numbers
      GPIO.setmode(GPIO.BCM)
      
      # Define GPIO to use on Pi
      GPIO_PIR = 7
      
      print "PIR Module Holding Time Test (CTRL-C to exit)"
      
      # Set pin as input
      GPIO.setup(GPIO_PIR,GPIO.IN)      # Echo
      
      Current_State  = 0
      Previous_State = 0
      
      try:
      
        print "Waiting for PIR to settle ..."
      
        # Loop until PIR output is 0
        while GPIO.input(GPIO_PIR)==1:
          Current_State  = 0
      
        print "  Ready"
      
        # Loop until users quits with CTRL-C
        while True :
      
          # Read PIR state
          Current_State = GPIO.input(GPIO_PIR)
      
          if Current_State==1 and Previous_State==0:
            # PIR is triggered
            start_time=time.time()
            print "  Motion detected!"
            # Record previous state
            Previous_State=1
          elif Current_State==0 and Previous_State==1:
            # PIR has returned to ready state
            stop_time=time.time()
            print "  Ready ",
            elapsed_time=int(stop_time-start_time)
            print " (Elapsed time : " + str(elapsed_time) + " secs)"
            Previous_State=0
      
      except KeyboardInterrupt:
        print "  Quit"
        # Reset GPIO settings
        GPIO.cleanup()

      Alternatively the script can also be easily downloaded onto your Pi directly using this command line :

      wget https://www.raspberrypi-spy.co.uk/archive/python/pir_2.py

      The script can then be run using :

      sudo python pir_2.py
      PIR Module #2
      PIR Module with two trimming controls

      When run the script waits for the output pin to go Low. Just like in pir_1.py it prints a message to the screen when movement is detected. The main difference is that it now measures the elapse of time between the output pin going High and it returning to Low.

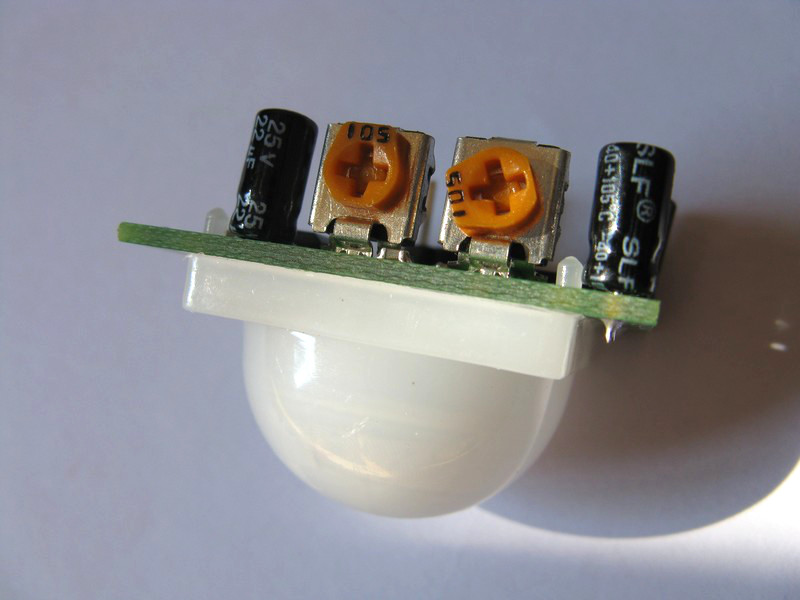
      You can use a small screwdriver to tweak the “time” control to increase or decrease the time. Once you’ve triggered the module it is important to stay still so you don’t increase the time the output stays High which will mess up your results.

      A half turn will result in the reset time being increased by a few minutes so it’s best to make adjustments in small increments.


      are available on eBay.

      Share. Facebook Twitter Pinterest LinkedIn Tumblr Email
      Previous ArticleRunning a Raspberry Pi from 6 AA Batteries
      Next Article Using DS18B20 Digital Temperature Sensors with the Raspberry Pi

      Related Posts

      Add Kodi to RetroPie Menu

      Disable Auto-login in Raspberry Pi OS

      Raspberry Pi Cloud Storage with MEGA

      6 Comments

      1. James Roberts on April 7, 2013 9:38 pm

        Hi Matt,

        Stumbled across your site while looking at circuit labs for pi circuits. Co-incidentaly, an equivalent PIR arrived in the post yesterday, so I’m testing it out with your code as we speak (albeit using the quick2wire interface board and their api – I’m new to electronice, so didn’t trust myself not to take out the Pi!).

        How have you found the performance of your PIR – even when I’m sitting down out of sight, I seem to get a number of spurious readings from it – fairly steady stream of detections, alternating between 1 and 2 seconds.

        Also, I guess this might be a Pi performance issue, but do you notice much of a lag between making a detectable movement and it registering – there seems a noticeable delay (I’m running agocontrol.com on the pi, but no gui).

        Cheers
        James

        Reply
      2. Anna on April 28, 2015 8:00 pm

        Hi Matt,
        Have you ever tried using several PIR motion sensors? It seems to be workign well with 1 sensor, but when I tried to read from 2 ports one by one the code failed

        Reply
        • Matt on April 28, 2015 8:07 pm

          It should work with 2 sensors as they can have separate GPIO pins. A lot of the code would need to be duplicated. It’s not a very efficient way of handling two sensors but should be possible.

          Reply
      3. Anna on April 30, 2015 6:31 pm

        Update on several sensors:

        Tried with 2 PI’s:
        1- Grove, first model of Raspberry pi + 4 motion sensors (given a large room) – didn’t work,
        2- Grove+ Raspberry Pi 2 – did work.

        I understand that it is not the most efficient ways to treat sensors as you have to force sleep after each sensor read and read sequentially but I have a large room with ceiling obstruction. What is the more efficient way to do it then?

        Reply
        • Matt on May 6, 2015 11:59 am

          A better technique would be to create a ‘class’ to define a PIR device. Then you use the class to create as many instances as required. This would reduce the code duplication.

          Reply
      4. Raul on July 26, 2015 1:43 pm

        Hi, i have a one cuestion: can it put vaious sensors in unique pin? Thanks

        Reply

      Leave A Reply Cancel Reply

      This site uses Akismet to reduce spam. Learn how your comment data is processed.

      Recent Posts
      May 6, 2022

      Add Kodi to RetroPie Menu

      February 26, 2022

      Disable Auto-login in Raspberry Pi OS

      February 2, 2022

      Raspberry Pi Cloud Storage with MEGA

      January 7, 2022

      RetroPie Temperature Monitor from Menu

      January 24, 2021

      Pi Pico Pinout and Power Pins

      Categories
      • 1-wire
      • 3D Printing
      • Add-ons
      • BBC Micro:bit
      • BerryClip
      • Books
      • Camera Module
      • Cases
      • Events
      • General
      • Hardware
      • I2C
      • Infographics
      • Interfaces
      • Minecraft
      • Model A+
      • Model B+
      • News
      • Pi Models
      • Pi Zero
      • Power
      • Programming
      • Python
      • Raspberry Pi OS
      • Raspbian
      • RetroGaming
      • Robotics
      • Sensors
      • Software
      • SPI
      • Tutorials & Help
      Tags
      3D Printing Arduino audio battery berryclip Birthday bluetooth cambridge camera CamJam DigiMakers display games GPIO I2C interface Kickstarter LCD LED Linux media Minecraft Model A Model B motionEyeOS PCB photography photos Pi-Lite portable power python Raspberry Jam Raspberry Pi Bootcamp raspbian Retrogaming retroPie screen SD card security sensor SPI temperature ultrasonic video
      Raspberry PI Related
      • Adafruit Blog
      • Average Maker
      • Official RaspBerry Pi Site
      • Raspberry Pi Pod
      • RasPi.tv
      • RaspTut
      • Stuff About Code
      Tech Resources
      • MattsBits – Pi Resources
      • Microbit Spy
      • Technology Spy
      Archives
      About

      Unofficial site devoted to the Raspberry Pi credit card sized computer offering tutorials, guides, resources,scripts and downloads. We hope to help everyone get the most out of their Pi by providing clear, simple articles on configuring, programming and operating it.

      Popular Posts
      September 19, 2014

      Top 5 Reasons The Raspberry Pi Sucks

      July 27, 2012

      16×2 LCD Module Control Using Python

      October 20, 2013

      Analogue Sensors On The Raspberry Pi Using An MCP3008

      Recent Posts
      May 6, 2022

      Add Kodi to RetroPie Menu

      February 26, 2022

      Disable Auto-login in Raspberry Pi OS

      February 2, 2022

      Raspberry Pi Cloud Storage with MEGA

      Facebook Twitter Instagram Pinterest YouTube RSS

      Entries RSS | Comments RSS

      This site is not associated with the official Raspberrypi.org site or the Raspberry Pi Foundation. Raspberry Pi is a trademark of the Raspberry Pi Foundation.

      Copyright © 2022 - All Rights Reserved - Matt Hawkins

      Type above and press Enter to search. Press Esc to cancel.