Interfacing a Raspberry Pi with a Radio Controlled car was on my list of projects so I need to experiment with powering the Pi from batteries. I had a number of basic requirements.
- Use AA batteries as I already had lots of rechargeables and chargers
- Reduce the overall cost low by keeping additional electronics to a minimum
The batteries would be required to power the Pi which needed 5V. AA batteries can vary in voltage from 1.2V-1.5V so some sort of voltage regulator was required to provide a stable 5V to the Pi. With the addition of a Bluetooth or WiFi dongle and some GPIO interfaces the regulator needed to provide 1A of current.
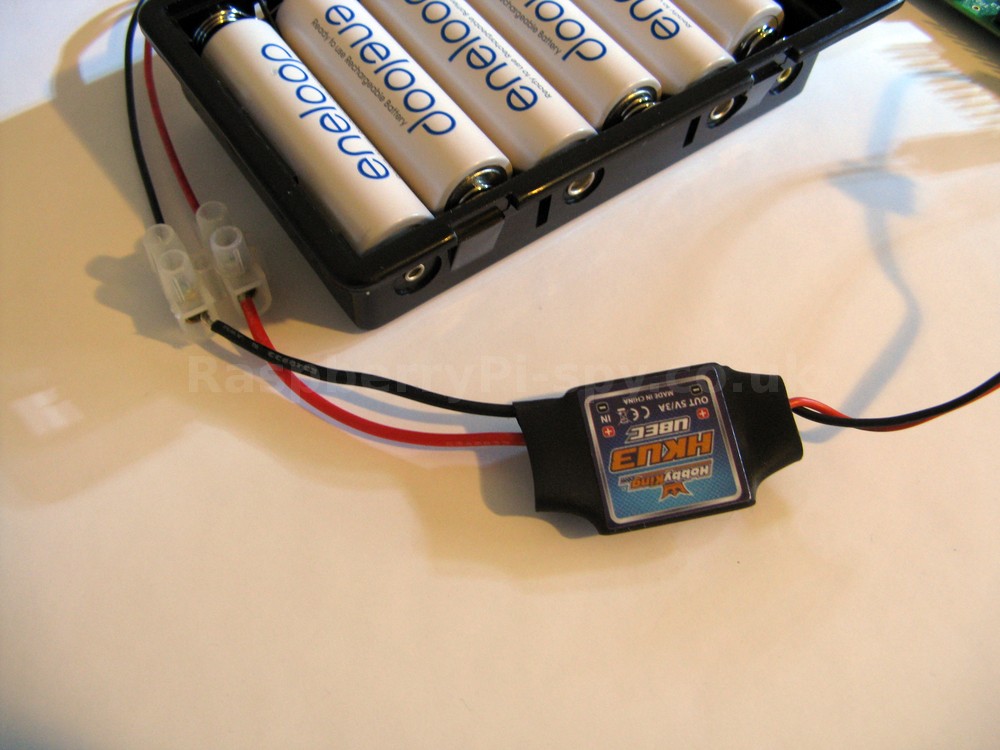
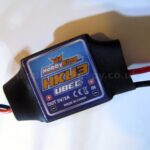 After some research I decided to buy a “UBEC”. In the Radio Controlled world this is a “Universal Battery Eliminator Circuit” but is really just a plain switch mode voltage regulator to everyone else. The device I bought from eBay was £5, provided 5V from an input of 5.5V-20V and was capable of supplying up to 3A. Perfect.
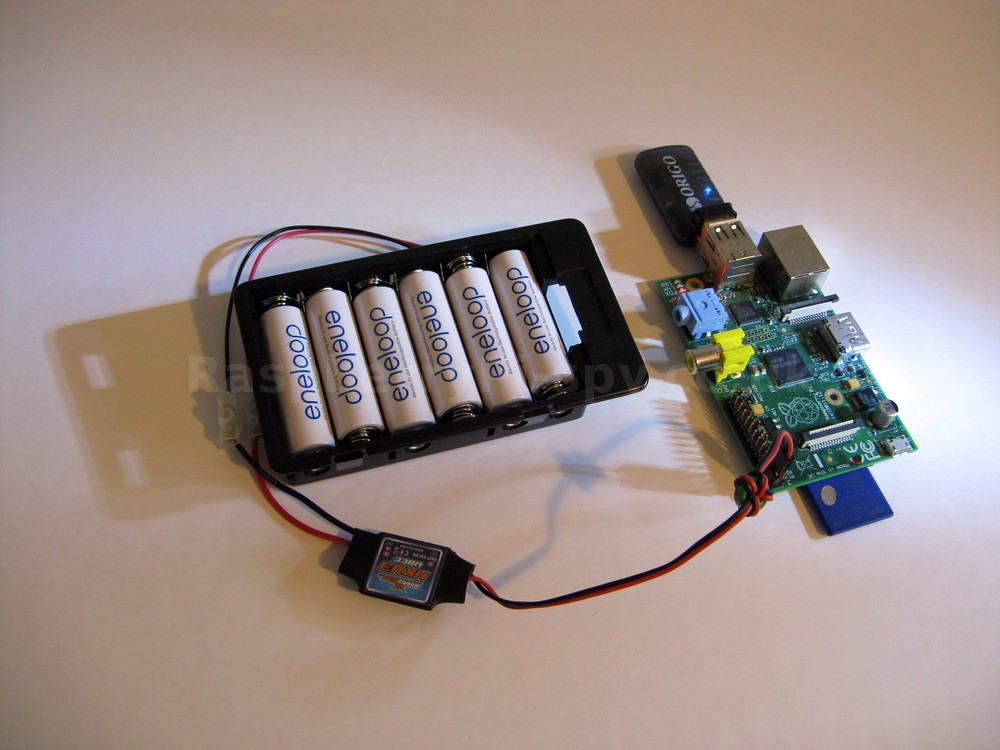
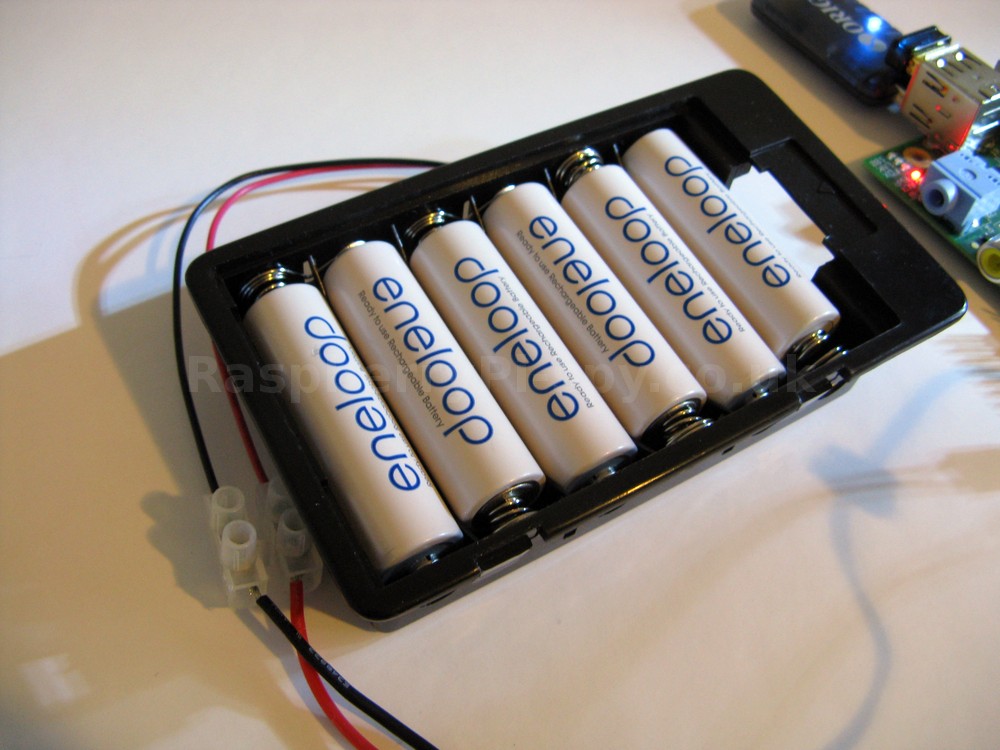
 Next I bought a battery box. 4 AAs might struggle to provide enough voltage to the regulator so I opted for a 6xAA battery box. I already had plenty of rechargeable AA batteries so I grabbed some Sanyo Eneloop (NiMH) cells and charged them up. These batteries are great as unlike regular rechargeables they hold their charge even if left for months without use.
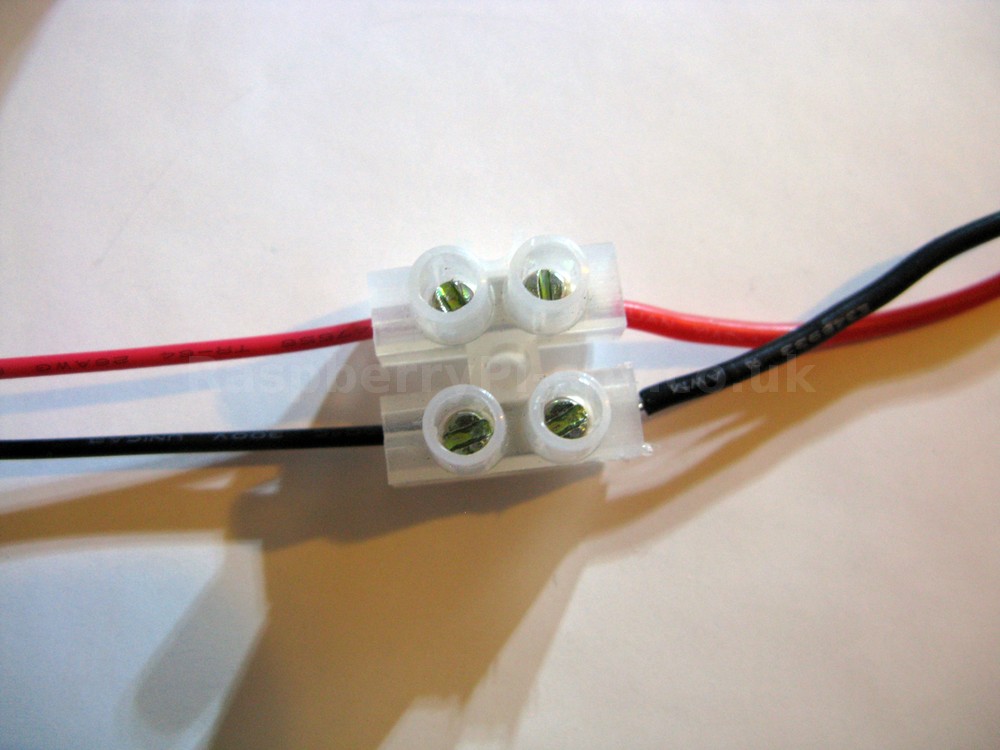
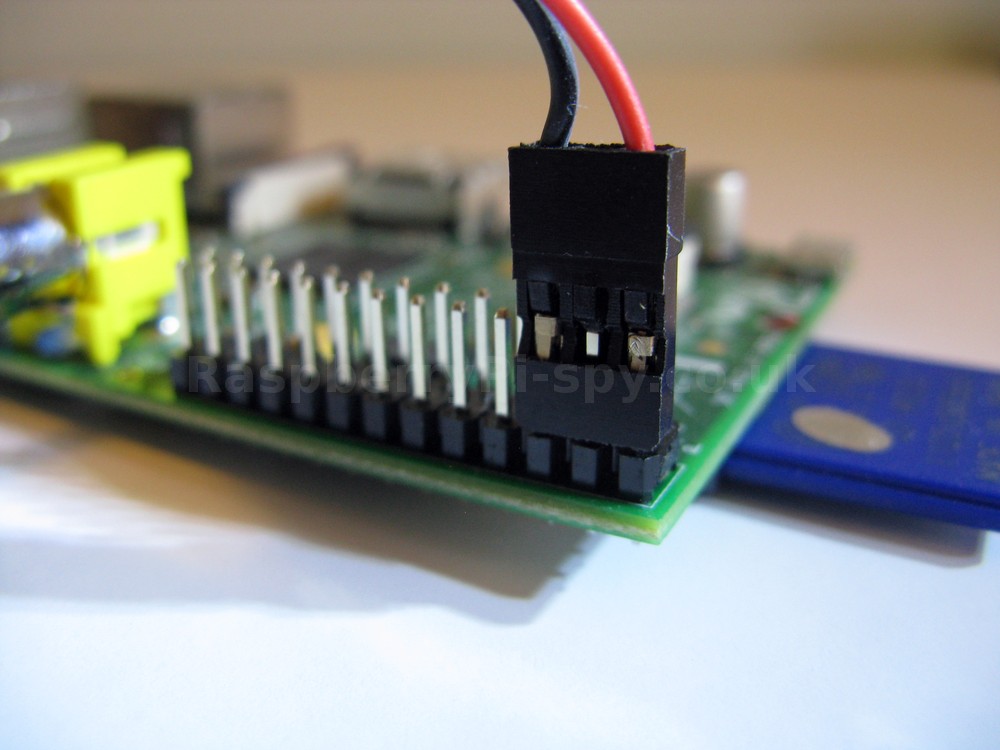
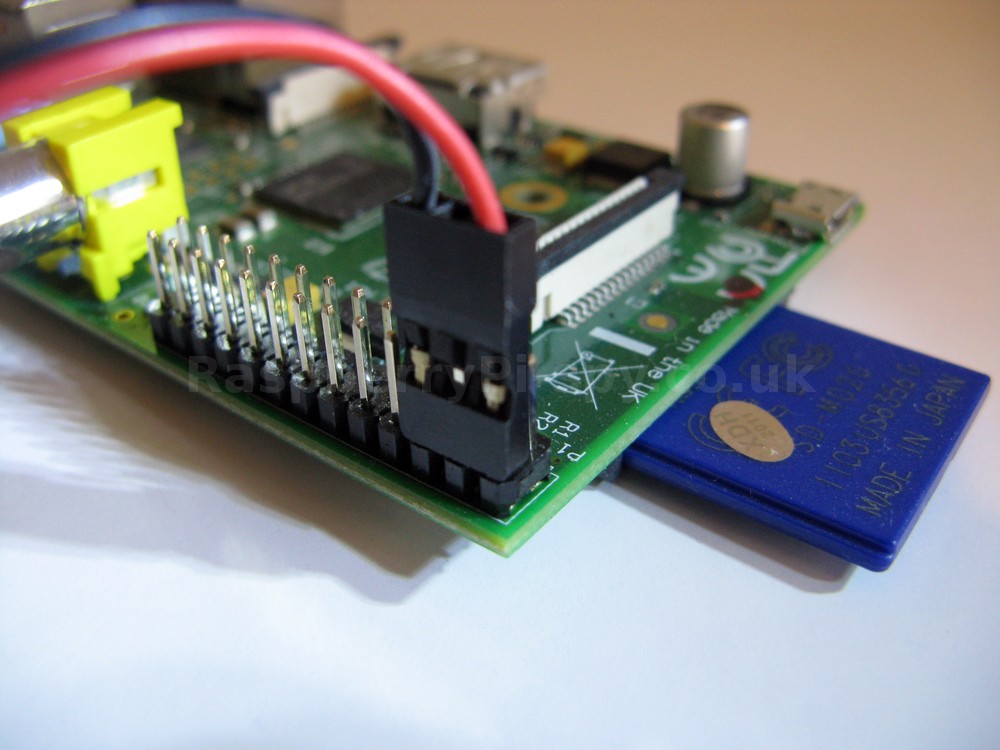
 The final stage was simply connecting the battery box to the UBEC regulator and the regulator to the Pi. The UBEC came with a 3 pin connector. I carefully repositioned one of the pins so that they had a space between them. This allowed the connector to plug onto the Pi’s GPIO header and provide +5V to Pin 2 and 0V to Pin 6.
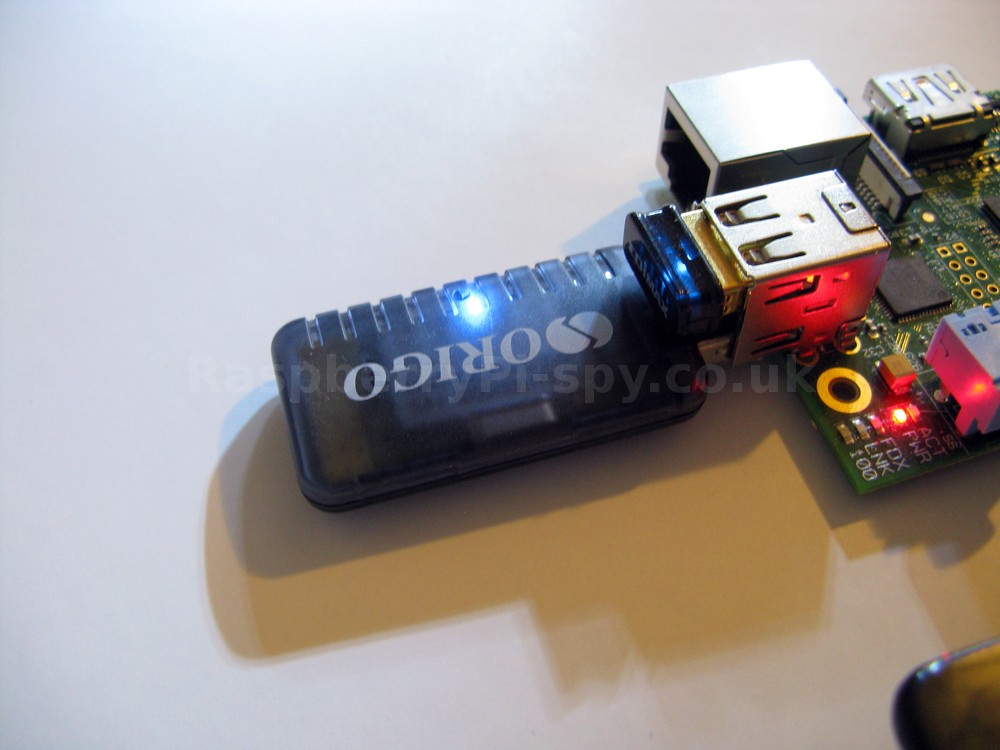
Here some photos of the basic setup I used to test my battery pack :
And the results? Well I ran two tests. I took a Raspberry Pi and plugged in an Edimax 7811 USB WiFi dongle. Then I connected the UBEC to the GPIO header. Finally I inserted the last battery into the battery holder to complete the circuit. I gave the Pi 60 seconds to boot and then connected to it using Putty via WiFi. I ran this command in Putty to constantly display the system uptime :
watch -n 60 uptime
Every minute the Putty window refreshed. This kept the WiFi connection active and proved the Pi was still operating. When the Raspberry Pi finally ran out power the last figure displayed in the Putty window gave the total time the Pi stayed powered.
- Model A (256MB) gave 16 hours 48 minutes
- Model B (256MB Rev 2.0) gave 7 hours 15 minutes
These are amazing results in my opinion. The Pi wasn’t asked to do any real work so I expect the times would be reduced in a real project but I was still impressed. If I doubled the number of batteries the Model A would probably run for 24+ hours!
26 Comments
Pretty good idea for a server battery backup to.
Can you please clarify if this was the 512mb version of the model B board?
Thanks
It was a 256MB Rev 2 which I bought a few days before they announced the 512MB upgrade!
If you are OK to void the warranty you could remove the 3.3V regulator (which is linear), and use a switching regulator to create that voltage too. You _could_ get an even longer running time, as long as the switching regulator is efficient.
Why you used GPIO instead of usb, for powering the pi? There is a particular reason or not?
The UBEC regulator had a three pin female header already attached. This meant I could plug it straight onto the GPIO pins. Using USB would have required messing about with USB cables.
Is that possible to measure the volts between Pin 2 and Pin 6?
Pins 2 and 6 are “occupied” by the power connector if you power it this way (I suppose you knew this). You can measure the voltages on the bottom of the PC board directly, or you can measure the voltage between TP1 (+) and TP2 (-). TP1 is next to the 3v3 regulator (near the 5V MicroUSB connector and capacitor), and TP2 is between the (yellow) video out and P1 header. [There are also several other test points which are easy to use but harder to explain.]
Cool,I was able to get the Model B Raspi powered on with only 4 AA batteries. I used an old cassette recorder to hold the batteries and pi in there. It was directly plugged into the RASPI and actually worked for a while until it killed my raspi since I didn’t use a regulator 🙂 I learned it the hard way.
Is it possible to charge the batteries up with while they are still plugged into the device for example able to charge them up with the micro usb port on the raspberry pi.
Not using the configuration I had setup. The regulator would not allow current to flow back into the batteries. To charge batteries at the same time you are using them would require some sort of charging regulator.
You bypassed the pi’s internal voltage regulator. This voids the warrenty and may cause damage to your pi if the external volatge regulator fluctuates.
That is true and obviously you take a risk whenever you connect something to the GPIO header … but the beauty of the Pi is that you can take risks you can’t take with a normal computer. In this case it is no more risky that attaching a powered USB hub. Many of which have sub-standard power circuits.
Hey this is interesting, thanks for posting. I had no idea the pi would work with power supplied to the GPIO pins, let alone that this would void the warranty…
So, what are you planning to do with your RC car – I had been thinking about doing this too, using the battery pack that came with my car to power the Raspi as well. I was thinking of using the Raspi to control the drive and steering servos on the car, maybe through commands sent over wifi, or maybe even setting up some kind of automatic self-driving like a model Google car? I’d be interested in what you have in mind!
I have buy 2x (8x AA batteri boxes ) now, i will test it but i will ask about, can i put 10x (8x AA batteri boxes) to it or will it make to much power?
Adding battery boxes in parallel will just mean it lasts longer. If you connected 2 8x boxes in parallel I would expect it to last twice as long as a single box.
Great article thanks. Just a question could I put say 15v through the UBEC and It would work fine? 🙂
Check the specs for the UBEC. It just depends on the range of input voltages it supports. I think mine supported 15V.
Do you think I could power an lcd screen AND a model 3B using this method?
Possible but it depends entirely on the LCD screen and what voltage it needs. Obviously the current draw from the screen will reduce the run time of the system.
Would a zener diode 5 volt – 5 watt do the job also?
The new lithium based primary cell AA batteries offer much longer life than even alkaline cells. Pricy, but good.
For service in a battery backup role, how about simply using a LARGE super capacitor, such as 10 Farad(!) backup. Best to use a resistor and diode to limit charge current or it will be n hour after power-up before you get boot. This should carry a critical system for quite a while.
`Natch, a sealed lithium cell is maintenance free and has high power density.
Pingback: [Videograime] Raspberry Pi Sobre Baterias | Atarefado
Pingback: [Videograime] Running Pi Over Batteries | Task Overload
Pingback: Gromit Unleashed – Field Testing The Raspberry Pi Camera | Raspberry Pi Spy
Pingback: Building a Bee Cam – Where do I start? | JCs Site