
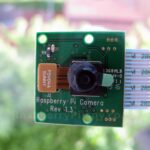
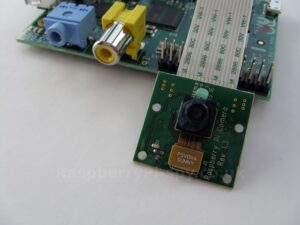
 Taking photos with the Pi Camera Module is easy once you have plugged it in and made the correct configuration changes. In order to do this make sure you have read my Installing The Raspberry Pi Camera Module page.
Once you’ve completed the camera installation you won’t need to do it again and you can concentrate on taking photos and recording HD video.
Basic Photo Capture
Capturing stills is done using the raspistill command line utiltity and is as easy as typing :
raspistill -o myimage.jpg
 This takes a photo which is then saved as “myimage.jpg”. By default the image is previewed on the screen and is captured after a 5 second delay. You can change the delay by using the “-t” option and supplying a time in milliseconds.
In the example below we take a photo with a delay of 3 seconds (3000 milliseconds) :
raspistill -o myimage.jpg -t 3000
This is a list of some of the more common options available when using raspistill :
-?,   --help       : This help information
-w,   --width      : Set image width <size>
-h,   --height     : Set image height <size>
-q,   --quality    : Set jpeg quality <0 to 100>
-o,   --output     : Output filename <filename>
-v,   --verbose    : Output verbose information during run
-t,   --timeout    : Time (in ms) before taking picture
                    (if not specified, set to 5s)
-th,  --thumb      : Set thumbnail parameters (x:y:quality)
-d,   --demo       : Run a demo mode
-e,   --encoding   : Output format (jpg, bmp, gif, png)
-tl,  --timelapse  : Timelapse mode. Takes a picture every <t>ms

-p,   --preview    : Preview window settings <'x,y,w,h'>
-f,   --fullscreen : Fullscreen preview mode
-n,   --nopreview  : Do not display a preview window

-sh,  --sharpness  : Set image sharpness (-100 to 100)
-co,  --contrast   : Set image contrast (-100 to 100)
-br,  --brightness : Set image brightness (0 to 100)
-sa,  --saturation : Set image saturation (-100 to 100)
-ISO, --ISO        : Set capture ISO

-vs,  --vstab      : Turn on video stablisation
-rot, --rotation   : Set image rotation (90,180,270)
-hf,  --hflip      : Set horizontal flip
-vf,  --vflip      : Set vertical flip
To get a full list of options that can be used type :
raspistill | less
Scroll using the arrow keys and press q to return to the command line.
Depending on how you position your camera you may need to use the “-rot” option to ensure your photos are the right way around.
Time Lapse Photo Capture
Another great feature of the utility is the easy capture of a series of images over a specified period of time. You could write your own software to do this but for speed you can’t beat the time lapse options provided :
raspistill -o myimage_%d.jpg -tl 2000 -t 25000
The -tl option sets the time between photos (in milliseconds) and the -t option sets the total time the sequence will last. So in this example a photo will be taken every two seconds (2000ms) for a total time of twenty five seconds (25000ms).
In this example we take a photo every minute (60000 milliseconds) for a total time of 2 hours (2 x 60 x 60 x 1000 milliseconds) :
raspistill -o myimage_%d.jpg -tl 60000 -t 7200000
The “%d” results in a sequence of numbered images being produced. In this case you would get images named :
myimage_1.jpg
myimage_2.jpg
myimage_3.jpg
myimage_4.jpg
...
If you change the “%d” to “%04d” you can pad the numbers with zeroes to always give four digits. I much prefer this as it gives you a sequence that looks like :
myimage_0001.jpg
myimage_0002.jpg
myimage_0003.jpg
myimage_0004.jpg
...
Much neater!
As I experiment with the camera I will add other posts and cover some more advanced techniques but until then have fun!
20 Comments
can we do the same with webcam?
The raspistill application only works with the official Raspberry Pi camera module. It is possible to capture images from a webcam but not all webcams work properly with the Pi. Unlikely to find a webcam that get close to the 5 megapixels of the camera module.
Can it take pictures in python without using python to run a command line (as in a module for python)? Or is it only possible using python to run a command line?
At the moment I’m not aware of a proper Python library. The sourcecode for the raspistill utility is available so it should be possible to create a library for it. This would be better for video recording as there isn’t a nice way to stop video recording at the moment without using “kill”. Creating a Python module is out of my league so I’m hoping someone with the skills can create one.
Do you know how to set a custom exposure time on an image e.g. for 30 seconds? The only suitable mode is ‘verylong’ exposure but it does not seem to have much effect. Thanks
Unfortunately not although I think it has been discussed on the Raspberry Pi forums. Hopefully the camera software will be developed in the future to allow these sort of features.
So I have my camera up and working, but where is it saving the pictures to?
Should be the same directory that you called raspistill from.
Hi Matt. We are using the camera in timelapse mode (1 sec interval) , have set the brightness, contrast and ISO and are capturing laser speckle patterns. Even though therse is no change in the speckle intensity on the subject over time, we find that over 20 images ther is a noticeable random overall change in the captured image intensity from image to image. We have tried various Metering Modes, but to no avail, the intensity changes from image to image. Soemtimes we also get an image that is monochrome or red, even though we are using a green laser. Any ideas?
Have you turned off or covered up the camera’s red led? That can be enough to interfere with images.
Can you please elaborate on how the LED effects image quality? I was always under the impression that the light is placed onboard the piCam to signal the camera being active
The LED can cause reflections on nearby surfaces (glass, perspex, shiny plastic etc) and this can result in a “glow” in the photos. Also if you are making a wildlife or security camera you might not want animals or burglars to see any light coming from your project.
Hi, many thanks for sharing this info.
I’m working on a DIY frame by frame cine film scanner, (currently running with Arduino ) and now considering using the RPi and camera for the frame by frame image capture…
I would be capturing 5MB stills, hopefully from a Python programme.
I wonder what the most rapid capturing of stills the Pi can handle?
The best way to test this might be to use the timelapse option and decrease the time between captures until the PI can’t handle the data any more.
This result would determine whether the Pi and camera is viable for my project, but I haven’t bought one yet…
If you have tried something like this (rapid stills capture) I’d love to hear your findings.. many thanks. Chris.
Ideally the Pi needs some time to do its exposure calibration so I suspect the stills rate would be something like 1 fps. However the Pi can capture Full HD video so you could simply capture the whole film as a video file?
I recently learned a 5 megapixel IP camera has an 8 second delay from seeing motion to showing it on the computer screen. Does the Raspberry Pi have zero delay so it can be useful for robot control? Thanks.
There is no reason the Pi can’t display video instantly. It depends how you are transmitting the data but I’ve seen people stream video from the Pi to a networked computer with no delay.
Hello
How can i set timeout -t option to infinity? I want to use camera as a microscope and overhead projector and it should stay on all the time.
How can i stream live image to network?
Hey Kari,
You probably have already figured out, how to stream pictures or videos, as I would suggest, from your pi. Anyway, I got streaming working using these instructions: http://www.akeric.com/blog/?p=2437
Where are the pictures saved? I can’t figure out what you meant by saying that they are in “the same directory that you called raspistill from.”. I can’t find that.
Please help.
At the point you run “raspistill” you are in a directory. This is most likely /home/pi. If you run the command “pwd” it will list the current directory. If you use the command “ls” it will list the files in the current directly. This will probably list the images captured.