Facebook Twitter Instagram Pinterest YouTube
    Trending
    • Add Kodi to RetroPie Menu
    • Disable Auto-login in Raspberry Pi OS
    • Raspberry Pi Cloud Storage with MEGA
    • RetroPie Temperature Monitor from Menu
    • Pi Pico Pinout and Power Pins
    • Install Arduino IDE on Raspberry Pi
    • Raspberry Pi 400 SSD Upgrade
    • Raspberry Pi Temperature Monitoring
    Facebook Twitter Instagram Pinterest YouTube RSS
    Raspberry Pi SpyRaspberry Pi Spy
    • Home
    • Categories
      • General
      • Hardware
      • Programming
      • Python
      • Software
      • Tutorials & Help
    • BerryClip
      • BerryClip Instructions
      • BerryClip Plus Instructions
      • Videos & Reviews
    • Buy
      • Buy Pi
      • Buy Pi Accessories
      • Buy Books
    • Tools
      • Ultimate Raspberry Pi Alexa Skill
      • Pi Power Estimator App
      • Pi-Lite 14×9 LED Matrix Sprite Editor
      • RPiREF Pin-out Reference App
      • Simple Ohm’s Law Calculator
      • Web Sites & Links
    • Tutorials & Help
        Featured
        November 9, 20200

        Raspberry Pi Temperature Monitoring

        Recent
        May 6, 2022

        Add Kodi to RetroPie Menu

        February 26, 2022

        Disable Auto-login in Raspberry Pi OS

        February 2, 2022

        Raspberry Pi Cloud Storage with MEGA

      1. Contact Us
      2. Site Map
      Raspberry Pi SpyRaspberry Pi Spy
      You are at:Home»Hardware»Add-ons»Getting Started With The Pi Co-op Arduino Raspberry Pi Addon
      Pi Co-op Arduino Addon

      Getting Started With The Pi Co-op Arduino Raspberry Pi Addon

      0
      By Matt on May 26, 2014 Add-ons, Tutorials & Help

      The Pi Co-op is an addon board for the Raspberry Pi which brings the power of an Arduino microcontroller to our favourite single board computer.

      Alan over at Dawn Robotics very kindly gave me a board to test. Apart from a brief session with the Gertduino I didn’t have much experience of Arduino programming.

      Alan assured me it was easy …

      What is the Pi Co-op?

      The Pi Co-op combines the flexibility of the Pi with the microcontroller awesomeness of the Arduino. For timing critical applications the Arduino is king. By adding one to the Pi you get better control of analogue sensors that require an analogue to digitial convertion and devices that have time sensitive data buses. This includes LCD screens and NeoPixels.

      Features

      • Pi Co-op Arduino AddonAtmega328p microcontroller
      • 10bit 8 channel ADC
      • Can be programmed directly from the Pi using the free Arduino IDE
      • UART baud rate of up to 115200bps
      • Atmega328p pins broken out to female headers for easy prototyping
      • Pi can be powered via board
      • Standard pin spacing of 2.54mm on all headers

      The full specification is on the official Pi Co-op product page including a link to the clearly presented user manual. The documentation (or lack of) is something that ended my experiments with the Gertduino.

      Here is a Dawn Robotics video which gives a nice introduction to the board :

      Step 1 – Initial Setup

      Setting up the Pi Co-op only takes a few simple steps. Run the two commands below on the command line. Your Pi will need to be connected to the internet :

      sudo apt-get update
      sudo apt-get install arduino git

      This will install the Arduino IDE (this will allow you to send Arduino “sketches” to the device) and the Git software management system. .

      Now run the following command to download the Pi Co-op resources :

      git clone https://bitbucket.org/DawnRobotics/pi_co-op.git

      In order to communicate with the device the serial port must be enabled on the Pi’s GPIO pins. The setup file provided can make these configuration changes to enable to serial interface. This allows your Pi to communicate with the Pi Co-op :

      cd pi_co-op
      sudo python setup_pi_co-op.py install

      Finish the configuration by restarting the Raspberry Pi

      sudo reboot

      Step 2 – Programming The Arduino

      When the Pi has rebooted run :

      startx

      to enter the LXDE desktop.

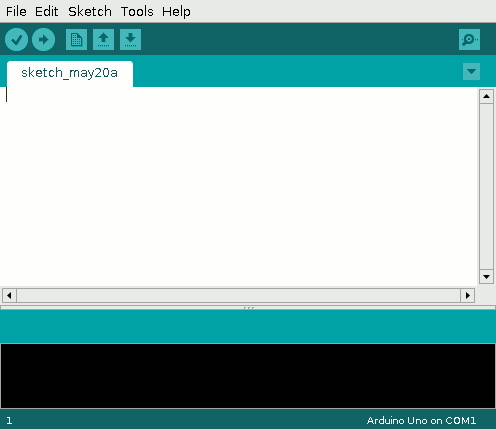
      You can now run the Arduino IDE. This can be done by using the icon under “Programming” within the desktop start menu or typing “arduino” within an LXTerminal command window. When it launches the IDE should look like this :

      Pi Co-op Arduino Setup
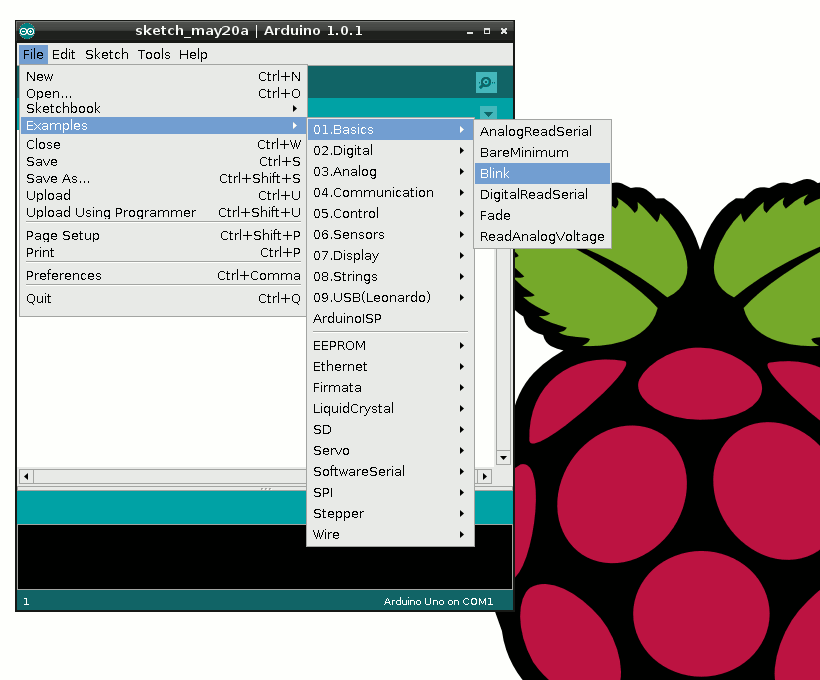
T here are lots of example scripts within the IDE known as “sketches”. The “hello world” example in the Arduino community is a sketch called “Blink”. Load the “Blink” example using the “File > Examples > 01 Basics > Blink” menu sequence :

      Pi Co-op Arduino Setup

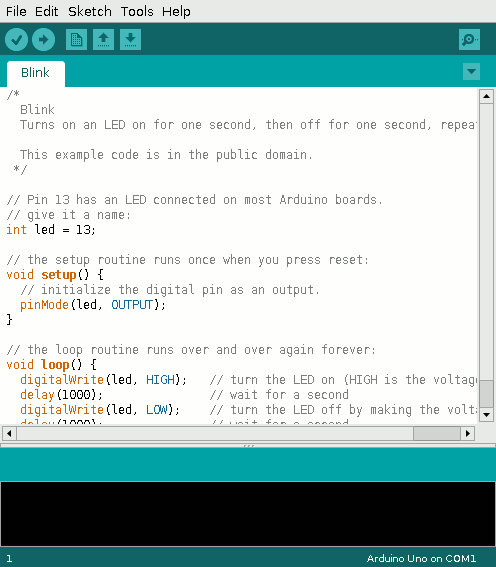
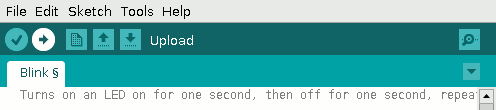
      The Blink sketch will load and look something like this :

      Pi Co-op Arduino Setup

      Although the defaults are usually correct, quickly check the board type is set to “Arduino Uno” using the “Tools > Board” menu sequence :

      Pi Co-op Arduino Setup

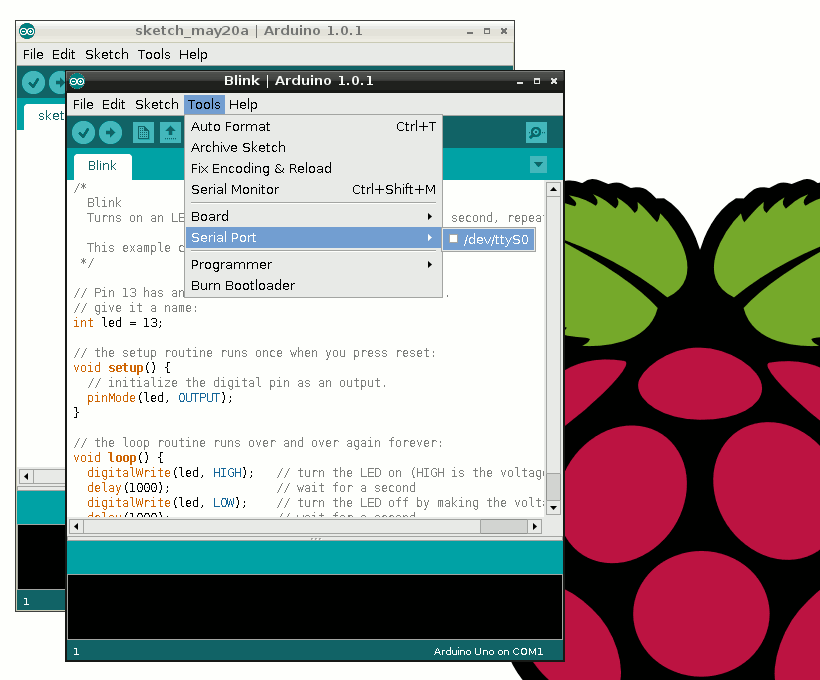
      Now check the serial port is set to ttyS0 using the “Tools > Serial Port” menu sequence :

      Pi Co-op Arduino Setup

      That’s the configuration done. Click the arrow icon to compile the sketch and upload it to the Pi Co-op :

      Pi Co-op Arduino SetupIf everything has gone to plane the LED on the Pi Co-op board should start blinking.

      Step 3 – Get Hacking!

      If you take a look at the Blink example you will see two lines stating :

      delay(1000);

      This is the delay (in milliseconds) between each LED blink. Change the number to 500 (half a second) and click the arrow icon to compile and upload. The LED should blink faster.

      Increase the number to make the LED blink slower.

      Next Steps

      The Pi Co-op acts like an Arduino Uno so for many projects you can connect up your hardware and find existing Uno sketches to get you started. I plan on doing a few more tutorials demonstrating some typical applications.


      Share. Facebook Twitter Pinterest LinkedIn Tumblr Email
      Previous ArticleHow To Mount A USB Flash Disk On The Raspberry Pi
      Next Article Simple Raspberry Pi Camera Photo Gallery Using PHP

      Related Posts

      Add Kodi to RetroPie Menu

      Disable Auto-login in Raspberry Pi OS

      Raspberry Pi Cloud Storage with MEGA

      Leave A Reply Cancel Reply

      This site uses Akismet to reduce spam. Learn how your comment data is processed.

      Recent Posts
      May 6, 2022

      Add Kodi to RetroPie Menu

      February 26, 2022

      Disable Auto-login in Raspberry Pi OS

      February 2, 2022

      Raspberry Pi Cloud Storage with MEGA

      January 7, 2022

      RetroPie Temperature Monitor from Menu

      January 24, 2021

      Pi Pico Pinout and Power Pins

      Categories
      • 1-wire
      • 3D Printing
      • Add-ons
      • BBC Micro:bit
      • BerryClip
      • Books
      • Camera Module
      • Cases
      • Events
      • General
      • Hardware
      • I2C
      • Infographics
      • Interfaces
      • Minecraft
      • Model A+
      • Model B+
      • News
      • Pi Models
      • Pi Zero
      • Power
      • Programming
      • Python
      • Raspberry Pi OS
      • Raspbian
      • RetroGaming
      • Robotics
      • Sensors
      • Software
      • SPI
      • Tutorials & Help
      Tags
      3D Printing Arduino audio battery berryclip Birthday bluetooth cambridge camera CamJam DigiMakers display games GPIO I2C interface Kickstarter LCD LED Linux media Minecraft Model A Model B motionEyeOS PCB photography photos Pi-Lite portable power python Raspberry Jam Raspberry Pi Bootcamp raspbian Retrogaming retroPie screen SD card security sensor SPI temperature ultrasonic video
      Raspberry PI Related
      • Adafruit Blog
      • Average Maker
      • Official RaspBerry Pi Site
      • Raspberry Pi Pod
      • RasPi.tv
      • RaspTut
      • Stuff About Code
      Tech Resources
      • MattsBits – Pi Resources
      • Microbit Spy
      • Technology Spy
      Archives
      About

      Unofficial site devoted to the Raspberry Pi credit card sized computer offering tutorials, guides, resources,scripts and downloads. We hope to help everyone get the most out of their Pi by providing clear, simple articles on configuring, programming and operating it.

      Popular Posts
      September 19, 2014

      Top 5 Reasons The Raspberry Pi Sucks

      July 27, 2012

      16×2 LCD Module Control Using Python

      October 20, 2013

      Analogue Sensors On The Raspberry Pi Using An MCP3008

      Recent Posts
      May 6, 2022

      Add Kodi to RetroPie Menu

      February 26, 2022

      Disable Auto-login in Raspberry Pi OS

      February 2, 2022

      Raspberry Pi Cloud Storage with MEGA

      Facebook Twitter Instagram Pinterest YouTube RSS

      Entries RSS | Comments RSS

      This site is not associated with the official Raspberrypi.org site or the Raspberry Pi Foundation. Raspberry Pi is a trademark of the Raspberry Pi Foundation.

      Copyright © 2022 - All Rights Reserved - Matt Hawkins

      Type above and press Enter to search. Press Esc to cancel.