Facebook Twitter Instagram Pinterest YouTube
    Trending
    • Elecrow Meteor IPS Touchscreen with RGB LEDs
    • Pi Pico Pinout Display on the Command Line
    • How to Add a Raspberry Pi Pico Reset Button
    • Pi Pico Onboard LED
    • Pi Pico W Pinout and Power Pins
    • CrowPi L Raspberry Pi Laptop and Learning Platform
    • Pi Pico W Launched
    • Add Kodi to RetroPie Menu
    Facebook Twitter Instagram Pinterest YouTube RSS
    Raspberry Pi SpyRaspberry Pi Spy
    • Home
    • Categories
      • General
      • Hardware
      • Programming
      • Python
      • Software
      • Tutorials & Help
    • BerryClip
      • BerryClip Instructions
      • BerryClip Plus Instructions
      • Videos & Reviews
    • Buy
      • Buy Pi
      • Buy Pi Accessories
      • Buy Books
    • Tools
      • Ultimate Raspberry Pi Alexa Skill
      • Pi Power Estimator App
      • Pi-Lite 14×9 LED Matrix Sprite Editor
      • RPiREF Pin-out Reference App
      • Simple Ohm’s Law Calculator
      • Web Sites & Links
    • Tutorials & Help
        Featured
        November 9, 20200

        Raspberry Pi Temperature Monitoring

        Recent
        December 23, 2022

        How to Add a Raspberry Pi Pico Reset Button

        November 20, 2022

        Pi Pico Onboard LED

        May 6, 2022

        Add Kodi to RetroPie Menu

      1. Contact Us
      2. Site Map
      Raspberry Pi SpyRaspberry Pi Spy
      You are at:Home»Hardware»Add-ons»Farnell PiFace Control & Display Raspberry Pi Add-on Board
      PiFace Control & Display

      Farnell PiFace Control & Display Raspberry Pi Add-on Board

      1
      By Matt on August 25, 2014 Add-ons, Hardware

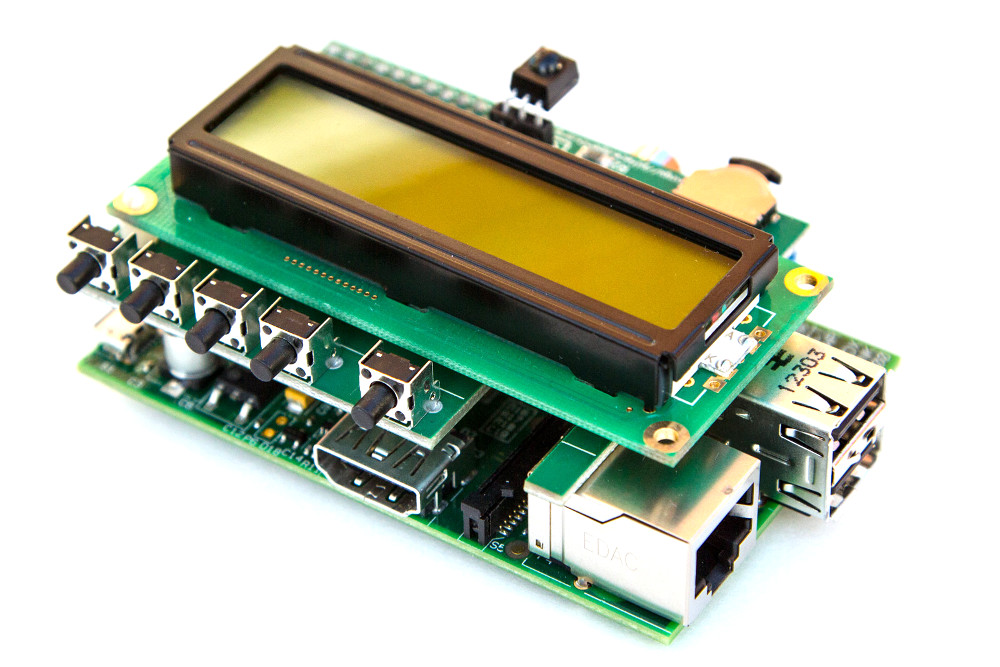
      The PiFace Control and Display (PiFace CAD) addon for the Raspberry Pi is a great way of adding a screen and buttons to your Pi. Once you’ve installed the Python libraries it is easy to get your code to interact with the screen while receiving input from the five buttons and rocker switch.

      This allows you to control your creation with menu based commands. It’s even got an Infra-red receiver so you can use a remote control. By making the hardware easy and providing a Python library you can spend more time on your functionality rather than worrying about wiring up your own switches.

      PiFace Control & Display

      The PiFace has a community page on Element14 which includes links to the user manual and other resources. It is available for £25 from Farnell or CPC.

      Specifications

      • 16 character by 2 line alphanumeric display
      • LED display backlight
      • User definable custom characters
      • 3-position navigation switch
      • 5 tactile switches
      • IR receiver for infrared remote control
      • Quick and easy menu building Python libraries provided

      Installation

      Make sure you are using the lastest version of Raspbian:

      sudo apt-get update
      sudo apt-get upgrade

      This may take 5-10 minutes but keeping your system up to date with the latest packages and drivers saves lots of time later if things don’t work as expected.

      Activate SPI Interface

      The PiFace board uses the SPI interface on the GPIO header but this usually needs to be enabled if you haven’t done so previously. Please follow my Enabling the SPI Interface on the Pi Tutorial.

      Install piFaceCAD

      The piFace CAD package gives you the libraries required to control the device in your own Python scripts. You can install pifacecad (for Python 3 and 2) with the following command:

      sudo apt-get install python{,3}-pifacecad

      The installation may take 5-10 minutes and you should reboot when it has finished :

      sudo reboot

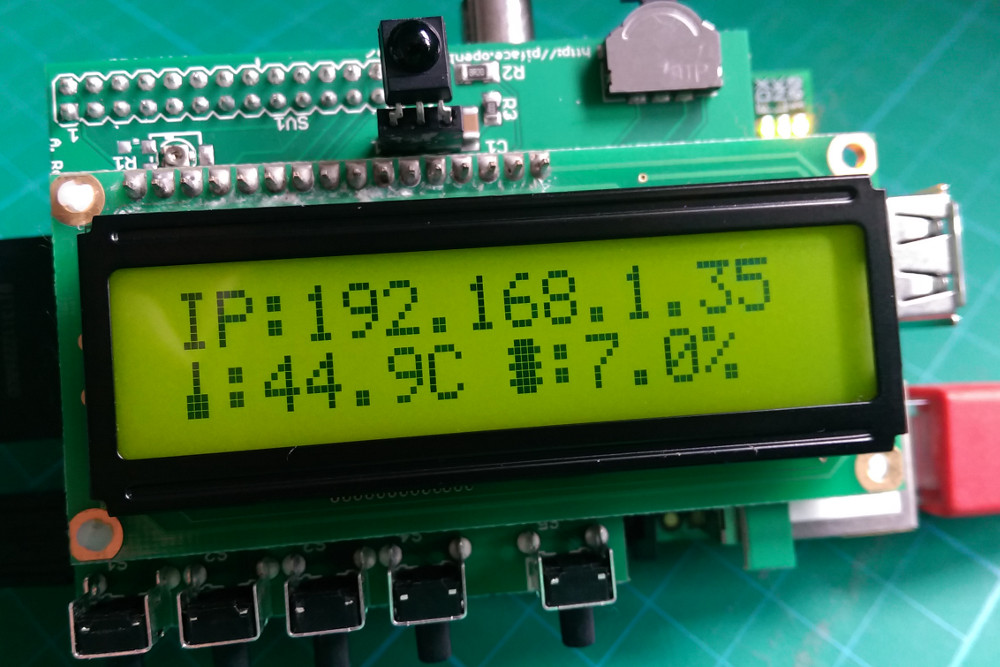
      Now you can test the installation by running the sysinfo.py program:

      python3 /usr/share/doc/python3-pifacecad/examples/sysinfo.py

      This should display your IP address, temperature and CPU load.

      PiFace Control & Display

      Example Python Script

      Here is another simple script to test the five switches :

      #!/usr/bin/python
      #--------------------------------------
      #
      #            Raspberry Pi
      #     PiFace Control & Display
      #
      # Test the PiFace Control & Display
      # switches (S1-S5)
      #
      # Author : Matt Hawkins
      # Date   : 25/08/2014
      #
      # https://www.raspberrypi-spy.co.uk/
      #
      #--------------------------------------
      
      # Import PiFace library
      import pifacecad as pf
      
      cad = pf.PiFaceCAD()
      cad.lcd.backlight_on()
      
      cad.lcd.clear()
      
      cad.lcd.write("Press a switch")
      
      while True:
      
        for x in range(5):
          if cad.switches[x].value==1:
            cad.lcd.clear()
            cad.lcd.write("Switch " + str(x+1))
      

      You download this script directly to your Pi using :

      wget https://bitbucket.org/MattHawkinsUK/rpispy-misc/raw/master/python/pifacecad_test.py

      It can be run using :

      python pifacecad_test.py

      There are more examples on the PiFace CAD Documentation Page.
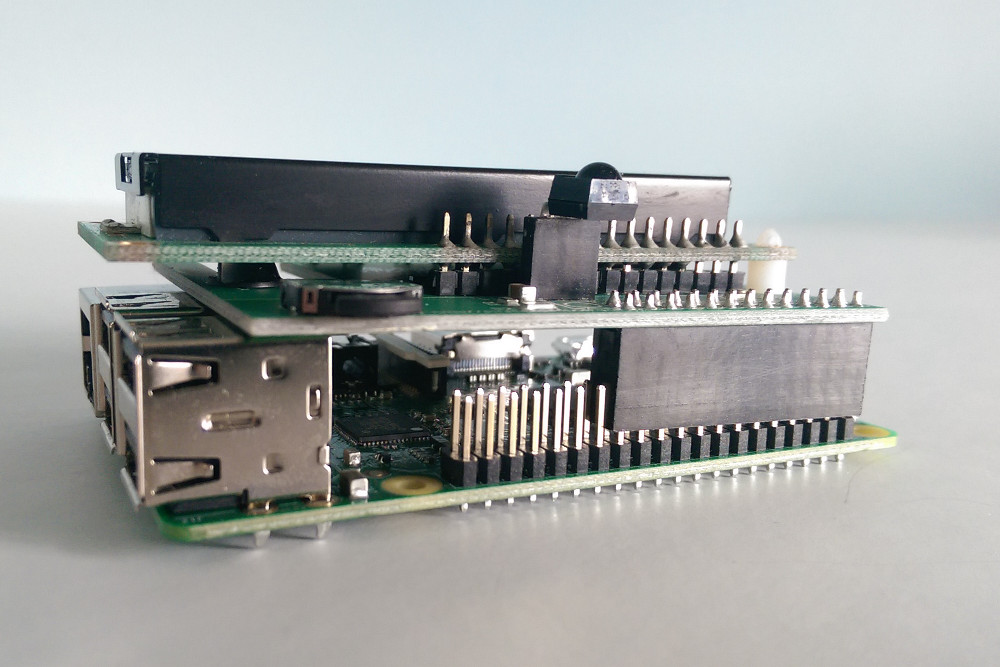
      Model B+

      The PiFace Control & Display fits all Pi models but due to the position of the GPIO header it sits at a slight angle on the B+. One corner of the PCB makes contact with the metal USB socket so a small piece of tape is a good idea to ensure solder joints don’t touch it.

      PiFace CAD on Model B+
      PiFace CAD on Model B+

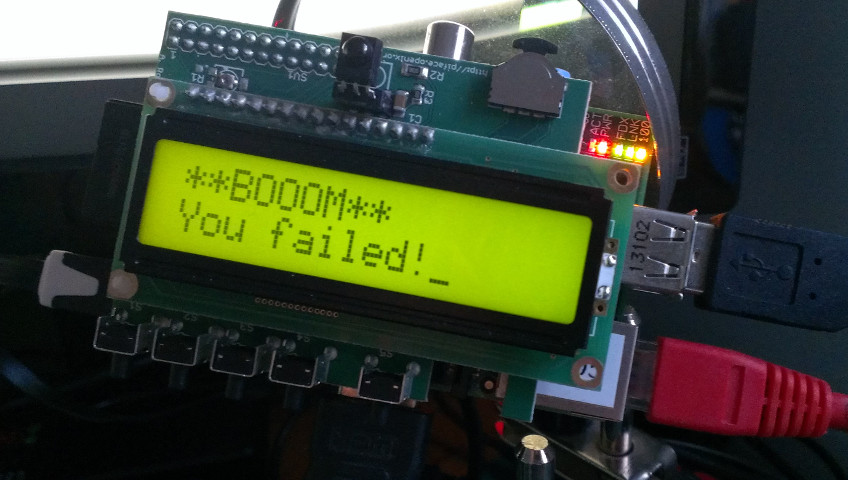
      Endless Applications

      What you use your PiFace CAD for is down to your imagination. The first project I used it in was a display for a Minecraft game written in Python.

      Operation Counterstrike PiFace


      Share. Facebook Twitter Pinterest LinkedIn Tumblr Email
      Previous ArticleEnable SPI Interface on the Raspberry Pi
      Next Article Infographic – Raspberry Pi Does It Need Securing

      Related Posts

      Elecrow Meteor IPS Touchscreen with RGB LEDs

      Pi Pico Pinout Display on the Command Line

      How to Add a Raspberry Pi Pico Reset Button

      1 Comment

      1. Ray Renteria on April 11, 2015 8:13 pm

        This looks like a great product. Do you have examples on how to interact with it using C++? Can it be used within C++?

        –Ray

        Reply

      Leave A Reply Cancel Reply

      This site uses Akismet to reduce spam. Learn how your comment data is processed.

      Recent Posts
      March 13, 2023

      Elecrow Meteor IPS Touchscreen with RGB LEDs

      December 26, 2022

      Pi Pico Pinout Display on the Command Line

      December 23, 2022

      How to Add a Raspberry Pi Pico Reset Button

      November 20, 2022

      Pi Pico Onboard LED

      November 14, 2022

      Pi Pico W Pinout and Power Pins

      Categories
      • 1-wire
      • 3D Printing
      • Add-ons
      • BBC Micro:bit
      • BerryClip
      • Books
      • Camera Module
      • Cases
      • Events
      • General
      • Hardware
      • I2C
      • Infographics
      • Interfaces
      • Minecraft
      • Model A+
      • Model B+
      • News
      • Pi Models
      • Pi Pico
      • Pi Zero
      • Power
      • Programming
      • Python
      • Raspberry Pi OS
      • Raspbian
      • RetroGaming
      • Robotics
      • Sensors
      • Software
      • SPI
      • Tutorials & Help
      Tags
      Arduino audio battery berryclip Birthday bluetooth cambridge camera CamJam DigiMakers display games GPIO I2C interface Kickstarter Kodi LCD LED Linux media Minecraft Model A motionEyeOS PCB photography photos Pi-Lite Pi Pico power python Raspberry Jam Raspberry Pi Bootcamp raspbian Retrogaming retroPie screen SD card security sensor SPI SSH temperature ultrasonic video
      Raspberry PI Related
      • Adafruit Blog
      • Average Maker
      • Official RaspBerry Pi Site
      • Raspberry Pi Pod
      • RasPi.tv
      • RaspTut
      • Stuff About Code
      Tech Resources
      • MattsBits – Pi Resources
      • Microbit Spy
      • Technology Spy
      Archives
      About

      Unofficial site devoted to the Raspberry Pi credit card sized computer offering tutorials, guides, resources,scripts and downloads. We hope to help everyone get the most out of their Pi by providing clear, simple articles on configuring, programming and operating it.

      Popular Posts
      September 19, 2014

      Top 5 Reasons The Raspberry Pi Sucks

      July 27, 2012

      16×2 LCD Module Control Using Python

      October 20, 2013

      Analogue Sensors On The Raspberry Pi Using An MCP3008

      Recent Posts
      March 13, 2023

      Elecrow Meteor IPS Touchscreen with RGB LEDs

      December 26, 2022

      Pi Pico Pinout Display on the Command Line

      December 23, 2022

      How to Add a Raspberry Pi Pico Reset Button

      Facebook Twitter Instagram Pinterest YouTube RSS

      Entries RSS | Comments RSS

      This site is not associated with the official Raspberrypi.org site or the Raspberry Pi Foundation. Raspberry Pi is a trademark of the Raspberry Pi Foundation.

      Copyright © 2022 - All Rights Reserved - Matt Hawkins

      mastodon.social@RPiSpy

      Type above and press Enter to search. Press Esc to cancel.