Facebook Twitter Instagram Pinterest YouTube
    Trending
    • Elecrow Meteor IPS Touchscreen with RGB LEDs
    • Pi Pico Pinout Display on the Command Line
    • How to Add a Raspberry Pi Pico Reset Button
    • Pi Pico Onboard LED
    • Pi Pico W Pinout and Power Pins
    • CrowPi L Raspberry Pi Laptop and Learning Platform
    • Pi Pico W Launched
    • Add Kodi to RetroPie Menu
    Facebook Twitter Instagram Pinterest YouTube RSS
    Raspberry Pi SpyRaspberry Pi Spy
    • Home
    • Categories
      • General
      • Hardware
      • Programming
      • Python
      • Software
      • Tutorials & Help
    • BerryClip
      • BerryClip Instructions
      • BerryClip Plus Instructions
      • Videos & Reviews
    • Buy
      • Buy Pi
      • Buy Pi Accessories
      • Buy Books
    • Tools
      • Ultimate Raspberry Pi Alexa Skill
      • Pi Power Estimator App
      • Pi-Lite 14×9 LED Matrix Sprite Editor
      • RPiREF Pin-out Reference App
      • Simple Ohm’s Law Calculator
      • Web Sites & Links
    • Tutorials & Help
        Featured
        November 9, 20200

        Raspberry Pi Temperature Monitoring

        Recent
        December 23, 2022

        How to Add a Raspberry Pi Pico Reset Button

        November 20, 2022

        Pi Pico Onboard LED

        May 6, 2022

        Add Kodi to RetroPie Menu

      1. Contact Us
      2. Site Map
      Raspberry Pi SpyRaspberry Pi Spy
      You are at:Home»Hardware»Camera Module»RobotSentry – Home Security System – Part 1
      Robot Sentry

      RobotSentry – Home Security System – Part 1

      6
      By Matt on July 29, 2015 Camera Module, I2C, Sensors

      Back in 2012 the Raspberry Pi caught my eye because I wanted to make a custom home security system. My mountain bike had been stolen and I wanted to make a system to have my revenge. Unfortunately I got side tracked and accidentally wrote 190 blog posts instead. Many of them are based on ideas I was trying out for potential security applications.

      So three years later I’ve decided to get back to my Pi roots and finish the system I had originally planned.

      As with many hobbyist projects I could buy a commercial off the shelf system but where is the fun in that? If I am going to catch a burglar I want the smug satisfaction I caught one with something I built myself.

      So this is the first part in a series of posts where I will aim to describe my system and present its progress. As I write this I’ve got half of it done and most of the components are sat in a shoe box.

      Requirements

      Here are the requirements I’ve defined for my system :

      • Movement triggered camera which can take photos
      • Be able to operate in day and night lighting conditions
      • Trigger infrared lamps if required based on light levels
      • Ability to send SMS and email notifications via Ethernet
      • Measure temperature and light levels
      • Give a visual indication the system is operating
      • Web interface for remote monitoring and system administration
      • Ability to upload photos off-site in case the local storage is tampered with or destroyed

      To keep things simple I’m focusing on taking photos rather than recording video. Given the positioning of the system I’m going to get a lot of movement from people, vehicles and cats and I suspect video would just get a bit difficult to manage and review.

      Raspberry Pi Choice

      Farnell Boxed Raspberry Pi
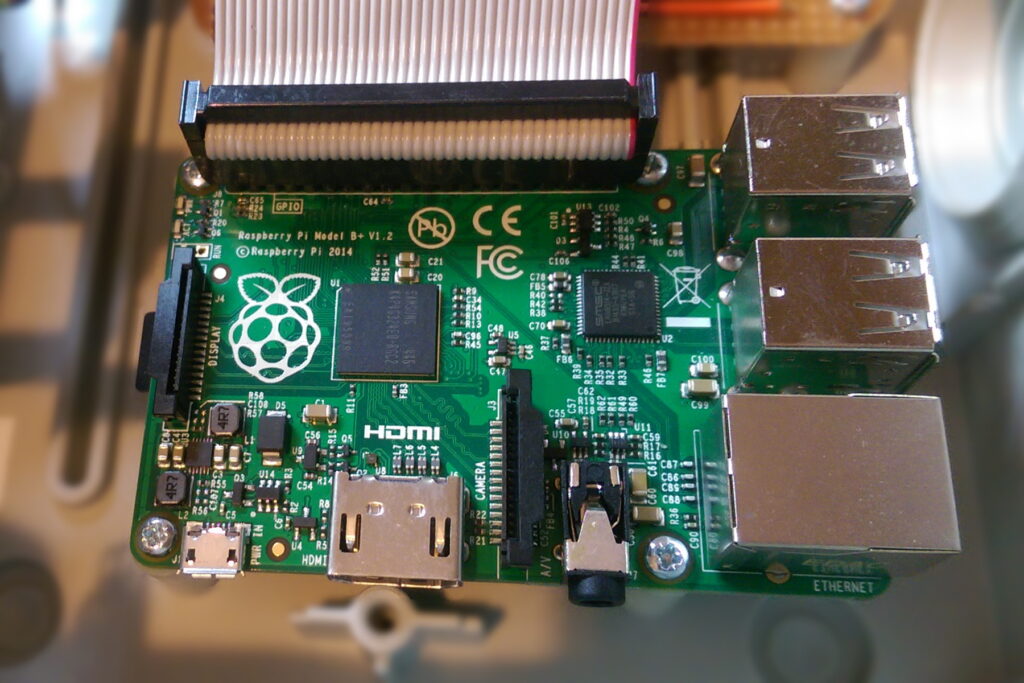
Originally I planned to use a Raspberry Pi Model B. Mainly because it was the only one available but I’ve decided to go for a Model B+. The Pi 2 was tempting but I wanted to get the system working on a normal Pi and give myself the option of an upgrade at a later date.

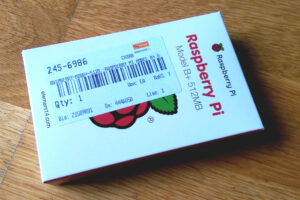
      So the first major component is a fresh Raspberry Pi Model B+ from Farnell Electronics.

      System Diagram

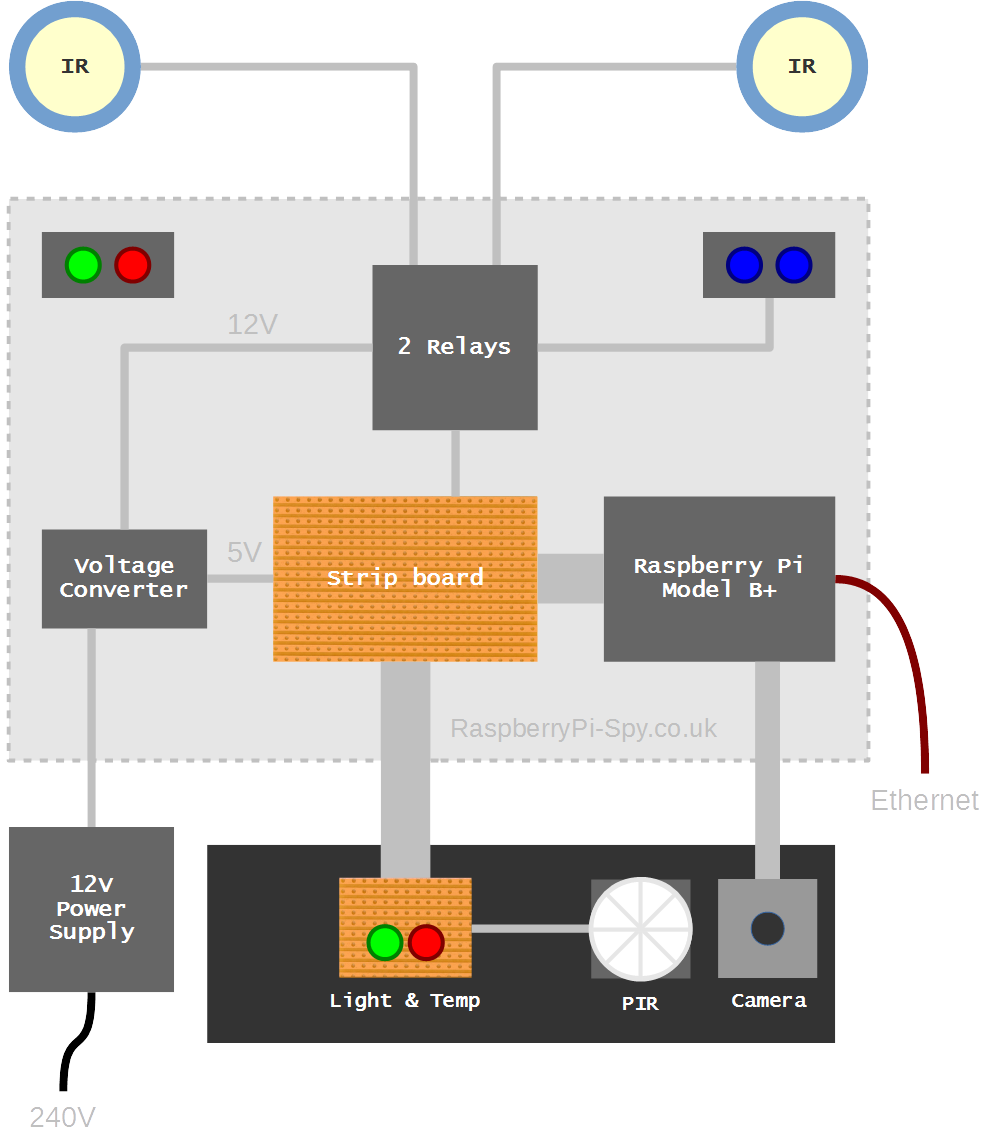
      In order to start planning the location of components and the interconnections between them I created a basic system diagram. The idea of this was to stop having to redraw the same system on a scrap of paper which I would almost certainly lose a few days later.

      The system consists of two boxes. One mounted inside my garage which provides power and ethernet. The second box is mounted outside and contain the camera and sensors. This allows the Pi to have some protection from extremes in temperature and allows it to continue functioning if the external box is attacked.

       Garage Alarm System Diagram 1

      Features

      • Internal Box
        • 12V 3.5A power supply
        • 12V to 5V voltage converter to provide the Pi with 5V
        • Raspberry Pi Model B+
        • Stripboard to provide connectors for cables
        • Switched Power connectors for 2 Intrared illuminators
      • External Box
        • PiNoIR camera
        • Passive Infrared module
        • Light sensor
        • Temperature sensor
        • Tamper switch

      Robot Sentry

      The external box is connected to the internal box via a 40 way ribbon cable and an extended Pi camera ribbon cable. Using ribbon cables means I can feed them into the garage without drilling any additional holes in the wall.

      Software

      The main code will be written in Python and make use of the RPi.GPIO and PiCamera libraries. The sensors are I2C based modules so I will use my own I2C tutorials to read data from them. At some point in the past I’ve written Python to do everything I need this system to do so it will be a case of bringing it all together.

      To start with I will write a test script that will exercise all the hardware components and prove they work as expected before I mount any hardware outside.

      Coming soon

      The next posts in this series will be :

      • RobotSentry – Home Security System – Part 2 – Shopping List
      • RobotSentry – Home Security System – Part 3 – Hardware Testing
      • RobotSentry – Home Security System – Part 4 – Installation Outside
      • RobotSentry – Home Security System – Part 5 – Working System!
      Share. Facebook Twitter Pinterest LinkedIn Tumblr Email
      Previous ArticleRaspberry Pi vs BBC Micro Bit
      Next Article RobotSentry – Home Security System – Part 2

      Related Posts

      Disable Auto-login in Raspberry Pi OS

      Raspberry Pi VPN Setup Guide

      Setting up SSH Keys on the Raspberry Pi

      6 Comments

      1. Kishlay Mishra on July 30, 2015 10:27 am

        I wanted to do this for a long time, but always got involved in some other work.

        I will also start building a similar setup. But I don’t have Pi camera. So, I will try to use a webcam. I am also planning to setup notification system on telegram or whatsapp and backup on google drive.

        Waiting to see your future posts !!

        Reply
      2. Ox on August 14, 2015 5:06 pm

        Hey! We are waiting to see your future posts, please post the next!!

        Reply
        • Matt on August 14, 2015 10:41 pm

          I’ve almost got part 2 ready. I just need to take a few photos of my progress so far. Hopefully I’ll get it done this weekend.

          Reply
      3. Matt on August 17, 2015 8:59 am

        Hey Matt,
        This is Matt, thanks in advance for writing this series. I have been trying something similar using an USB camera and the motion service. I am very interested in seeing how this progresses!

        Thanks,
        Matt

        Reply
      4. Joseph on January 19, 2016 1:14 pm

        Hi Matt,
        I am eager to get my hands on the completed 5 part series, looks very interesting. I am seriously considering buying a Raspberry Pi 2, to experiment with different projects.

        Regards
        Joseph

        Reply
      5. Seb on April 17, 2016 7:52 pm

        Hi, is your system able to survive a power cut from attackers (is there any power backup)
        Great presentation, I m eager to see the whole article !

        Reply

      Leave A Reply Cancel Reply

      This site uses Akismet to reduce spam. Learn how your comment data is processed.

      Recent Posts
      March 13, 2023

      Elecrow Meteor IPS Touchscreen with RGB LEDs

      December 26, 2022

      Pi Pico Pinout Display on the Command Line

      December 23, 2022

      How to Add a Raspberry Pi Pico Reset Button

      November 20, 2022

      Pi Pico Onboard LED

      November 14, 2022

      Pi Pico W Pinout and Power Pins

      Categories
      • 1-wire
      • 3D Printing
      • Add-ons
      • BBC Micro:bit
      • BerryClip
      • Books
      • Camera Module
      • Cases
      • Events
      • General
      • Hardware
      • I2C
      • Infographics
      • Interfaces
      • Minecraft
      • Model A+
      • Model B+
      • News
      • Pi Models
      • Pi Pico
      • Pi Zero
      • Power
      • Programming
      • Python
      • Raspberry Pi OS
      • Raspbian
      • RetroGaming
      • Robotics
      • Sensors
      • Software
      • SPI
      • Tutorials & Help
      Tags
      Arduino audio battery berryclip Birthday bluetooth cambridge camera CamJam DigiMakers display games GPIO I2C interface Kickstarter Kodi LCD LED Linux media Minecraft Model A motionEyeOS PCB photography photos Pi-Lite Pi Pico power python Raspberry Jam Raspberry Pi Bootcamp raspbian Retrogaming retroPie screen SD card security sensor SPI SSH temperature ultrasonic video
      Raspberry PI Related
      • Adafruit Blog
      • Average Maker
      • Official RaspBerry Pi Site
      • Raspberry Pi Pod
      • RasPi.tv
      • RaspTut
      • Stuff About Code
      Tech Resources
      • MattsBits – Pi Resources
      • Microbit Spy
      • Technology Spy
      Archives
      About

      Unofficial site devoted to the Raspberry Pi credit card sized computer offering tutorials, guides, resources,scripts and downloads. We hope to help everyone get the most out of their Pi by providing clear, simple articles on configuring, programming and operating it.

      Popular Posts
      September 19, 2014

      Top 5 Reasons The Raspberry Pi Sucks

      July 27, 2012

      16×2 LCD Module Control Using Python

      October 20, 2013

      Analogue Sensors On The Raspberry Pi Using An MCP3008

      Recent Posts
      March 13, 2023

      Elecrow Meteor IPS Touchscreen with RGB LEDs

      December 26, 2022

      Pi Pico Pinout Display on the Command Line

      December 23, 2022

      How to Add a Raspberry Pi Pico Reset Button

      Facebook Twitter Instagram Pinterest YouTube RSS

      Entries RSS | Comments RSS

      This site is not associated with the official Raspberrypi.org site or the Raspberry Pi Foundation. Raspberry Pi is a trademark of the Raspberry Pi Foundation.

      Copyright © 2022 - All Rights Reserved - Matt Hawkins

      mastodon.social@RPiSpy

      Type above and press Enter to search. Press Esc to cancel.