Facebook Twitter Instagram Pinterest YouTube
    Trending
    • Add Kodi to RetroPie Menu
    • Disable Auto-login in Raspberry Pi OS
    • Raspberry Pi Cloud Storage with MEGA
    • RetroPie Temperature Monitor from Menu
    • Pi Pico Pinout and Power Pins
    • Install Arduino IDE on Raspberry Pi
    • Raspberry Pi 400 SSD Upgrade
    • Raspberry Pi Temperature Monitoring
    Facebook Twitter Instagram Pinterest YouTube RSS
    Raspberry Pi SpyRaspberry Pi Spy
    • Home
    • Categories
      • General
      • Hardware
      • Programming
      • Python
      • Software
      • Tutorials & Help
    • BerryClip
      • BerryClip Instructions
      • BerryClip Plus Instructions
      • Videos & Reviews
    • Buy
      • Buy Pi
      • Buy Pi Accessories
      • Buy Books
    • Tools
      • Ultimate Raspberry Pi Alexa Skill
      • Pi Power Estimator App
      • Pi-Lite 14×9 LED Matrix Sprite Editor
      • RPiREF Pin-out Reference App
      • Simple Ohm’s Law Calculator
      • Web Sites & Links
    • Tutorials & Help
        Featured
        November 9, 20200

        Raspberry Pi Temperature Monitoring

        Recent
        May 6, 2022

        Add Kodi to RetroPie Menu

        February 26, 2022

        Disable Auto-login in Raspberry Pi OS

        February 2, 2022

        Raspberry Pi Cloud Storage with MEGA

      1. Contact Us
      2. Site Map
      Raspberry Pi SpyRaspberry Pi Spy
      You are at:Home»Hardware»Sensors»How to use a Hall Effect Sensor with the Raspberry Pi
      Hall Effect Sensor and Magnet

      How to use a Hall Effect Sensor with the Raspberry Pi

      4
      By Matt on September 28, 2015 Sensors, Tutorials & Help

      Last month I bought myself a 3D printer. It uses standard micro-switches to register the position of the movable parts. I wanted to replace these with something less mechanical and someone on the support forum mentioned using a hall effect sensor instead.

      A hall effect sensor can detect the presence of a magnetic field and is often used for positioning objects or measuring rotation. For example you could use one to measure the speed of a bike wheel by attaching a magnet to one of the spokes.

      In order to test the idea and check the distance at which the sensor would trigger I decided to use a Raspberry Pi and a bit of Python.

      A1120 Hall Effect SensorHall Effect Sensor

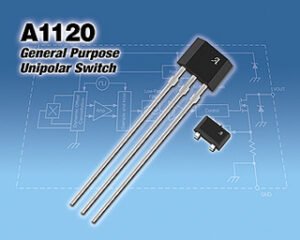
      The sensor I chose was an Allegro hall effect sensor A1120EUA-T. It cost approximately £1 from CPC. For any old-timers out there, no it isn’t one of these.

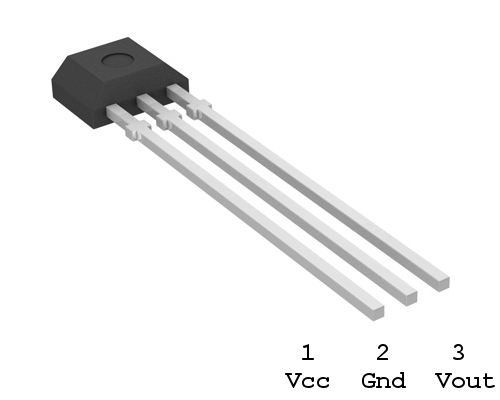
      Here is the pin assignment :

      A1120 Hall Effect Sensor Pinout

      Magnet

      MagnetI wanted a cheap, compact magnet that I would be able to easily mount on the printer so I ordered some from Amazon. There was no real science to this and involved a little bit of guess work. I went for some “N48 Grade Rare Earth Neodymium” magnets that were small cylinders measuring 5 x 10mm. They cost £4 for 50 magnets.

      Circuit

      Hall Effect Sensor and Magnet

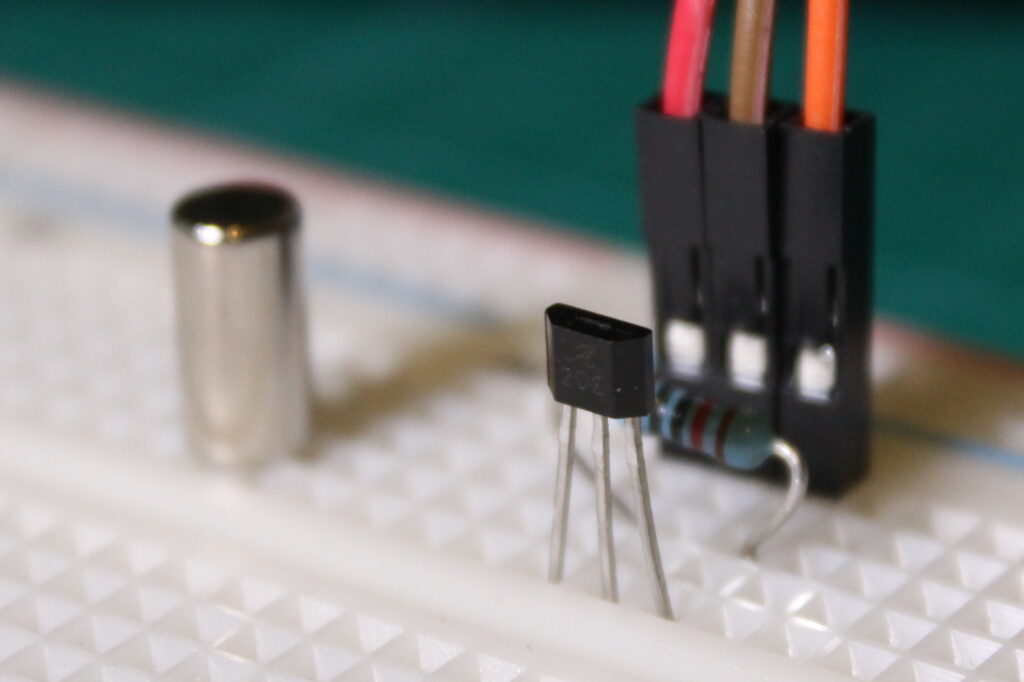
      In the photo above the red wire is Vcc (3.3V), the brown wire is ground and the orange wire is Vout.

      Here is the circuit diagram :

      Hall Effect Sensor Circuit

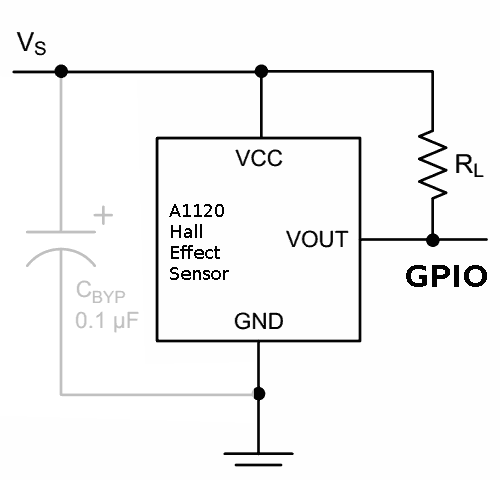
      Vcc is connected to the 3.3V supply on the Pi’s header (pin 1). GND is connected to pin 6. Vout is connected to pin 11 (GPIO17) although you can use any of the spare GPIO pins. A 10K (or similar) resistor pulls the output high. The manufacturer recommends putting a 0.1uF capacitor between Vcc and GND to reduce noise but I found it worked fine without it.

      Pi HeaderA1120
       3.3V (Pin 1)Pin 1
       Gnd (Pin 6)Pin 2
       GPIO17 (Pin 11)Pin 3

      Rather than use an external pull-up resistor I used the internal resistors available on the Pi’s GPIO pins.

      Example Python Code

      The Python script I wrote simply configured the GPIO pin as an input, pulled it high and setup a call-back function. Whenever the state of the sensor changed it fired the call-back function and printed some text. GPIO17 went “low” when a magnet was near the sensor and returned to “high” when the magnet was removed.

      It’s not very complicated and can be downloaded directly to your Pi using :

      wget https://bitbucket.org/MattHawkinsUK/rpispy-misc/raw/master/python/hall.py

      The script can be run in Python 2 using :

      python hall.py

      or if you are in Python 3 using :

      python3 hall.py

      Triggering Distance

      I quickly found out that the triggering distance was approx 15mm. This made the setup perfect for my application. This assumed that the end of the cylinder is inline with the flat face of the hall effect sensor. Other magnets would almost certainly result in a different triggering distance so you may have to experiment with alternative magnets if your application requires a different distance.

      Share. Facebook Twitter Pinterest LinkedIn Tumblr Email
      Previous ArticleOfficial Raspberry Pi Touchscreen Display is here
      Next Article Raspbian Configuration Utility and New Boot Options

      Related Posts

      Add Kodi to RetroPie Menu

      Disable Auto-login in Raspberry Pi OS

      Raspberry Pi Cloud Storage with MEGA

      4 Comments

      1. Gavin on September 29, 2015 9:59 pm

        Hi Matt,
        I too have also been looking for an alternative to the microswitch for the Z-end-stop on my 3D printer. In your experiments, did you notice any hysteresis in the hall effect sensor. Ie, you said the sensor triggered at approx 15mm. However, at what distance did the sensor then return to normal when you withdrew the magnet?

        Great article!

        Reply
        • Matt on September 30, 2015 8:06 pm

          Hi Gavin, I’ve just given it a quick test and I had to withdraw the magnet about 3-4mm. I’m hoping this will be OK for my printer to complete it’s calibration cycle.

          Reply
      2. simo on October 1, 2018 3:59 pm

        does the Raspberry read the analogue signal …I think you need and ADC ?

        Reply
        • Matt on October 5, 2018 2:44 pm

          This sensor is digital so either presents a logic High or Low to the Pi’s GPIO pin. So no need for an ADC.

          Reply

      Leave A Reply Cancel Reply

      This site uses Akismet to reduce spam. Learn how your comment data is processed.

      Recent Posts
      May 6, 2022

      Add Kodi to RetroPie Menu

      February 26, 2022

      Disable Auto-login in Raspberry Pi OS

      February 2, 2022

      Raspberry Pi Cloud Storage with MEGA

      January 7, 2022

      RetroPie Temperature Monitor from Menu

      January 24, 2021

      Pi Pico Pinout and Power Pins

      Categories
      • 1-wire
      • 3D Printing
      • Add-ons
      • BBC Micro:bit
      • BerryClip
      • Books
      • Camera Module
      • Cases
      • Events
      • General
      • Hardware
      • I2C
      • Infographics
      • Interfaces
      • Minecraft
      • Model A+
      • Model B+
      • News
      • Pi Models
      • Pi Zero
      • Power
      • Programming
      • Python
      • Raspberry Pi OS
      • Raspbian
      • RetroGaming
      • Robotics
      • Sensors
      • Software
      • SPI
      • Tutorials & Help
      Tags
      3D Printing Arduino audio battery berryclip Birthday bluetooth cambridge camera CamJam DigiMakers display games GPIO I2C interface Kickstarter LCD LED Linux media Minecraft Model A Model B motionEyeOS PCB photography photos Pi-Lite portable power python Raspberry Jam Raspberry Pi Bootcamp raspbian Retrogaming retroPie screen SD card security sensor SPI temperature ultrasonic video
      Raspberry PI Related
      • Adafruit Blog
      • Average Maker
      • Official RaspBerry Pi Site
      • Raspberry Pi Pod
      • RasPi.tv
      • RaspTut
      • Stuff About Code
      Tech Resources
      • MattsBits – Pi Resources
      • Microbit Spy
      • Technology Spy
      Archives
      About

      Unofficial site devoted to the Raspberry Pi credit card sized computer offering tutorials, guides, resources,scripts and downloads. We hope to help everyone get the most out of their Pi by providing clear, simple articles on configuring, programming and operating it.

      Popular Posts
      September 19, 2014

      Top 5 Reasons The Raspberry Pi Sucks

      July 27, 2012

      16×2 LCD Module Control Using Python

      October 20, 2013

      Analogue Sensors On The Raspberry Pi Using An MCP3008

      Recent Posts
      May 6, 2022

      Add Kodi to RetroPie Menu

      February 26, 2022

      Disable Auto-login in Raspberry Pi OS

      February 2, 2022

      Raspberry Pi Cloud Storage with MEGA

      Facebook Twitter Instagram Pinterest YouTube RSS

      Entries RSS | Comments RSS

      This site is not associated with the official Raspberrypi.org site or the Raspberry Pi Foundation. Raspberry Pi is a trademark of the Raspberry Pi Foundation.

      Copyright © 2022 - All Rights Reserved - Matt Hawkins

      Type above and press Enter to search. Press Esc to cancel.