Close Menu
    Facebook X (Twitter) Instagram Pinterest YouTube
    Trending
    • Disable SSH Password Login on Raspberry Pi
    • Elecrow Meteor IPS Touchscreen with RGB LEDs
    • Pi Pico Pinout Display on the Command Line
    • How to Add a Raspberry Pi Pico Reset Button
    • Pi Pico Onboard LED
    • Pi Pico W Pinout and Power Pins
    • CrowPi L Raspberry Pi Laptop and Learning Platform
    • Pi Pico W Launched
    Mastodon YouTube Facebook Instagram Pinterest RSS
    Raspberry Pi SpyRaspberry Pi Spy
    • Home
    • Categories
      • General
      • Hardware
      • Programming
      • Python
      • Software
      • Tutorials & Help
    • BerryClip
      • BerryClip Instructions
      • BerryClip Plus Instructions
      • Videos & Reviews
    • Buy
      • Buy Pi
      • Buy Pi Accessories
      • Buy Books
    • Tools
      • Ultimate Raspberry Pi Alexa Skill
      • Pi Power Estimator App
      • Pi-Lite 14×9 LED Matrix Sprite Editor
      • RPiREF Pin-out Reference App
      • Simple Ohm’s Law Calculator
      • Web Sites & Links
    • Tutorials & Help
        Featured
        November 9, 20200

        Raspberry Pi Temperature Monitoring

        Recent
        February 16, 2024

        Disable SSH Password Login on Raspberry Pi

        December 23, 2022

        How to Add a Raspberry Pi Pico Reset Button

        November 20, 2022

        Pi Pico Onboard LED

      1. Contact Us
      2. Site Map
      Raspberry Pi SpyRaspberry Pi Spy
      You are at:Home»Software»Adding A Watermark Or Logo To A Timelapse Video Using Avconv

      Adding A Watermark Or Logo To A Timelapse Video Using Avconv

      4
      By Matt on June 1, 2013 Software, Tutorials & Help

      The purpose of this post is to demonstrate how to add a logo to your time-lapse videos. The logo can be any graphic you can create and could easily be a watermark or text. The objective was to add my Raspberry Pi Spy logo to the bottom corner of a video at the same time I rendered my timelapse videos from the source images.

      This article assume you’ve correctly installed your camera module and had a play with taking photos with it.

      Here is a list of the hardware and software I used :

      • Raspberry Pi camera module connected to a Model B
      • Latest version of Raspbian on an 8GB SD card
      • Libav installed on my PC (download here)
      • Gimp installed on my PC (download here)
      • WinSCP installed on my PC (download here)

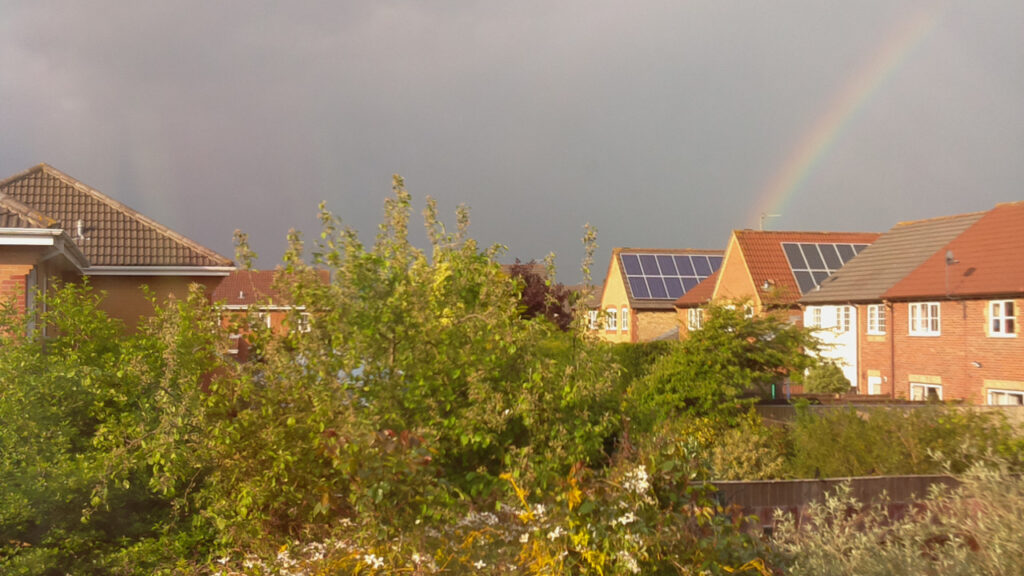
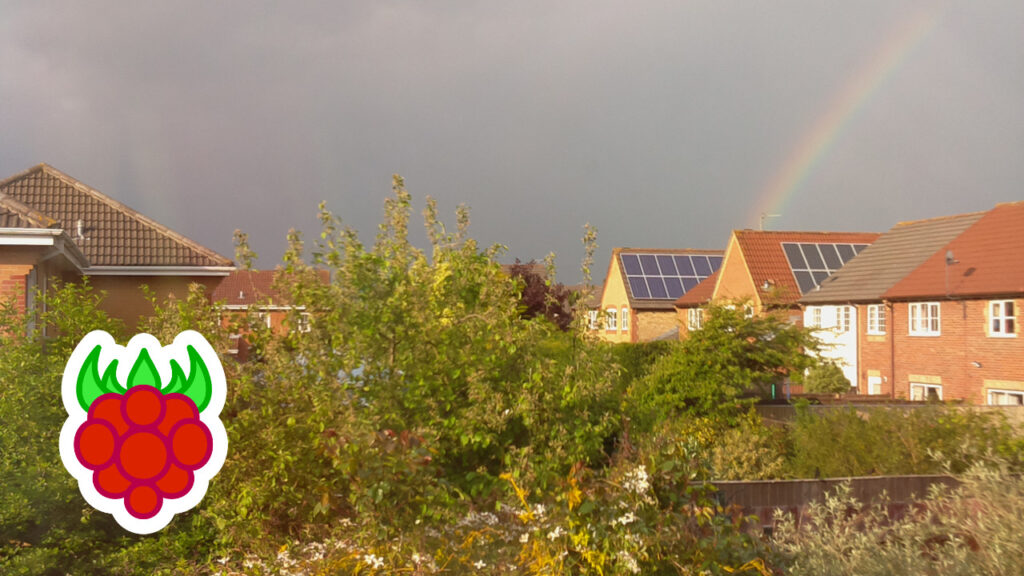
      Here is an example image from my sequence followed by the effect I was after with a logo in the bottom corner.

      Timelapse Example - No Logo
      Timelapse Example - With Logo

      Step 1 – Create time-lapse sequence

      To start off I needed a sequence of images so I used this command to get the Raspberry Pi camera to create an image every 30 seconds for 1 hour. This was a total of 120 images.

      raspistill -o timelapse_%04d.jpg -tl 30000 -t 3600000

      To speed things up I decided to create the video on my PC so I copied the 120 images from the Pi to the PC using WinSCP.

      Step 2 – Create logo overlay graphic

      Next I created my overlay image in Gimp that was 280×280 in size and saved as a PNG file. This format is great because it allowed my logo to sit on a transparent background. This image was named “watermark.png” and copied into the same directory as the set of images from the Pi.

      Step 3 – Test video

      I used AVConv (part of the Libav library) to compile the MP4 videos. This is an alternative to using FFmpeg. This can be done on the Pi but it is much faster on the PC.

      To get a quick feel for the video and decide on a frame rate I created an initial video using :

      avconv -r 5 -i timelapse_%04d.jpg
             -r 5 -vcodec libx264 -crf 20 -g 2
             -vf crop=2592:1458,scale=1280:720 timelapse.mp4

      Step 4 – Final Video

      Once I decided the frame rate was OK it was time to re-render the video. This time I added the additional options to the AVConv command to overlay the logo on top of the video :

      avconv -r 5 -i timelapse_%04d.jpg
             -r 5 -vcodec libx264 -crf 20 -g 2
             -vf "movie=watermark.png [watermark];[in] crop=2592:1458,
                  scale=1280:720 [cropped],[cropped][watermark]
                  overlay=20:20 [out]" timelapse_logo.mp4

      Here is the final video complete with a brief rainbow and rain splattered window :

      Share. Facebook Twitter Pinterest LinkedIn Tumblr Email
      Previous ArticleCreating Timelapse Videos With The Raspberry Pi Camera
      Next Article Raspberry Pi Command Line Audio

      Related Posts

      Disable SSH Password Login on Raspberry Pi

      How to Add a Raspberry Pi Pico Reset Button

      Pi Pico Onboard LED

      4 Comments

      1. Alanb on June 8, 2013 8:38 am

        Funny to do is adding a timestamp-watermark to your images :


        for i in `find /raspitimelapse/ -name \*.jpg`; do
        STAMP=`/bin/date -r $i +"%H:%M:%S %d-%m-%Y"`
        /usr/bin/convert -pointsize 40 -size 1280x700 xc:none -fill red -gravity SouthEast -draw "text 30,10 '$STAMP'" miff:- | /usr/bin/composite -tile - $i $i
        done

        “date -r” reads the modification date of the image.

        Reply
        • Nick Earle on June 9, 2013 8:55 pm

          Hi Alanb,

          This is exactly what I wanted to do! What do I need to install to get the Convert and Composite functionality?

          Nick

          Reply
          • Matt on June 10, 2013 8:44 pm

            Nick, I think those utilities are part of the “Imagemagick” image processing library. Not had a chance to check but try installing using “sudo apt-get install imagemagick”.

            Reply
            • Nick Earle on June 11, 2013 1:42 pm

              Thanks Matt, that works like a dream.

              Nick

              Reply
      Leave A Reply Cancel Reply

      This site uses Akismet to reduce spam. Learn how your comment data is processed.

      Recent Posts
      February 16, 2024

      Disable SSH Password Login on Raspberry Pi

      March 13, 2023

      Elecrow Meteor IPS Touchscreen with RGB LEDs

      December 26, 2022

      Pi Pico Pinout Display on the Command Line

      December 23, 2022

      How to Add a Raspberry Pi Pico Reset Button

      November 20, 2022

      Pi Pico Onboard LED

      Categories
      • 1-wire
      • 3D Printing
      • Add-ons
      • BBC Micro:bit
      • BerryClip
      • Books
      • Camera Module
      • Cases
      • Events
      • General
      • Hardware
      • I2C
      • Infographics
      • Interfaces
      • Minecraft
      • Model A+
      • Model B+
      • News
      • Pi Models
      • Pi Pico
      • Pi Zero
      • Power
      • Programming
      • Python
      • Raspberry Pi OS
      • Raspbian
      • RetroGaming
      • Robotics
      • Sensors
      • Software
      • SPI
      • Tutorials & Help
      Tags
      Arduino audio battery berryclip Birthday bluetooth cambridge camera CamJam DigiMakers display games GPIO I2C interface Kickstarter Kodi LCD LED Linux media Minecraft Model A motionEyeOS PCB photography photos Pi-Lite Pi Pico power python Raspberry Jam Raspberry Pi Bootcamp raspbian Retrogaming retroPie screen SD card security sensor SPI SSH temperature ultrasonic video
      Raspberry PI Related
      • Adafruit Blog
      • Average Maker
      • Official RaspBerry Pi Site
      • Raspberry Pi Pod
      • RasPi.tv
      • RaspTut
      • Stuff About Code
      Tech Resources
      • MattsBits – Pi Resources
      • Microbit Spy
      • Technology Spy
      Archives

      Entries RSS | Comments RSS

      This site is not associated with the official Raspberrypi.org site or the Raspberry Pi Foundation. Raspberry Pi is a trademark of the Raspberry Pi Foundation.

      Copyright © 2025 - All Rights Reserved - Matt Hawkins

      About

      Unofficial site devoted to the Raspberry Pi credit card sized computer offering tutorials, guides, resources,scripts and downloads. We hope to help everyone get the most out of their Pi by providing clear, simple articles on configuring, programming and operating it.

      Popular Posts
      September 19, 2014

      Top 5 Reasons The Raspberry Pi Sucks

      July 27, 2012

      16×2 LCD Module Control Using Python

      October 20, 2013

      Analogue Sensors On The Raspberry Pi Using An MCP3008

      Latest Posts
      February 16, 2024

      Disable SSH Password Login on Raspberry Pi

      March 13, 2023

      Elecrow Meteor IPS Touchscreen with RGB LEDs

      December 26, 2022

      Pi Pico Pinout Display on the Command Line

      Mastodon YouTube Instagram Facebook Pinterest RSS

      Entries RSS | Comments RSS

      This site is not associated with the official Raspberrypi.org site or the Raspberry Pi Foundation. Raspberry Pi is a trademark of the Raspberry Pi Foundation.

      Copyright © 2025 - All Rights Reserved - Matt Hawkins

      mastodon.social@RPiSpy

      Type above and press Enter to search. Press Esc to cancel.